There was a report on androidapps.com today about some business issues for app developers on Android
http://www.androidapps.com/games/articles/8567-android-market-missing-out-on-game-marketing-others-fill-the-gap
This is hot issue for app developers who have, perhaps unwisely, chosen Android as their platform of choice.
Let's break it down:
"Games have become an integral part of the Android experience, benefiting gamers, developers and Android alike.
The focus is games, but the analysis most likely applies at some level to other app-type as well.
"But as the rivalry between Android and iOS heats up, and third party marketplaces emerge as alternative portals for Android apps, Android games become an important experiment in software marketing and distribution."
Right - e.g. what about Amazon's Android market? How does that work, and should we be paying attention to it?
"From fragmentation issues on Android’s operating system to disappointing restrictions on app publishing in the Android Market, game developers have a lot to consider as they hope to monetize their efforts on the Android platform."
For sure. Who's the author? I like the tone already. Who's the author? It turns it it's a woman - cool - and the author of the "Twitter Survival Guide" (that sounds familiar, but who knows? Survival guide is a good alternative to "for Dummies" as a generic title). Her name is Kristen Nicole. Maybe I'll follow her on twitter.
onward:
"Android Market pricing fail
Some interesting pricing rules have been uncovered in the Android Market, disabling developers from charging fees on an app that’s been set as a free product."
Yes, right! What's up with that policy? I don't get it.
"This means developers can’t have one-day sales on apps, or run a promotion for a new app before making it paid."
Also true. Although, the "sales" and "promotions" mean giving it away. So, I guess the idea is free samples, get the word out, and let the buzz generate paid customers.
"It’s no wonder you see multiple versions of a given app in the Android Market -- what a confusing demonstration for end users."
Right. And it makes it trickier for developers, who have to juggle multiple versions.
"Game developers in particular may find this Market rule frustrating, as marketing an Android game has become a difficult and disparate experience."
Hopefully this won't be much of an issue for me, but I'm not sure.
"Rivals rule with promos
Not only is the Android Market less structured in terms of promotions when compared to the iTunes App Store, but independent marketplaces are taking advantage of the Market’s shortcomings."
Its true; with the AppStore, you feel like you're in a real store. In the app marketplace - it's more like a zoo.
"The Amazon Appstore, for instance, has made app promotions central to its strategy in gaining users, often offering full version games for free download."
Right, they have the free app per day or something.
"GetJar has turned into another important gaming portal, running similar promotions for Android games."
I wonder how my Japanese quiz game fits into these strategies. Probably not much. It's more of a long-tail thing.
"Both the Amazon Appstore and GetJar have landed exclusive Android game launches, with publishers waiting several days to make their game available on the Market after a promotion has run its course."
Ok, but it's not really my problem. Or is it? I'm thinking I should stick with the Market.
"As Appolicious Advisor Marty Gabel points out in his article on the Android Market’s questionable pricing rule, this is holding back Google in the end. The gap is opening up a range of opportunities for third-party services to monetize games, through redeemable codes, in-app purchases or other incentives."
Google has in-app purchase. I'm very curious about how this is working right now. Probably not much - otherwise, we'd be hearing good things.
"Adknowledge, the company behind Super Rewards, recognizes that relying on a single portal is a drawback for game developers, and has launched Social2Web for social game developers looking to expand beyond networks like Facebook. Combining the best of all worlds, Social2Web becomes an agnostic approach to game distribution, across mobile or the web."
It would be good to have a one size fit's all distribution channel, wouldn't it. I wonder if that's exclusive to games?
What about "adknowleged?"
"60+ billion impressions per month
80 million clicks per month
Over 10,000 advertisers"
Adknowledge, the fourth largest advertiser marketplace, specializes in performance-based marketing solutions utilizing its powerful predictive technology and completely anonymous consumer response patterns to connect advertisers with consumers across multiple channels, including email, search, domains, and social networks. With over 60 terabytes of anonymous consumer behavior data, our proprietary targeting systems run over 20 billion calculations per day to determine what ad to show to each consumer. Over 10,000 advertisers use the Adknowledge ad network to promote their offers."
Another ad company? There are so many. This one, like Jumptap, has a system for matching consumer data with ads. How does it work?
Here's the article cited:
"Social2Web Solution Enables Developers to Expand Distribution and Monetization
SAN FRANCISCO, Calif. – AllFacebook Expo – June 28, 2011 – Social game developers now have a solution that enables them to expand game distribution and monetization beyond Facebook and into the Web. Today Adknowledge launched Social2Web, the first viral game monetization solution that enables game developers to extend their reach by creating standalone versions of their Facebook games on their own URL."
Well, I'm not coming out of facebook. Drop it for now.
I'm also curious to read the article on Google's app pricing regulation:
http://www.androidapps.com/games/articles/8556-fieldrunners-developer-among-those-confused-by-pricing-rules-in-android-market
I'm going to quote the whole article here. It's definitely worth a read. It goes into detail about why such things as one-day-sales work, and the timing of free apps. That extract is also included below.
"For all the discussion about how free and open the Android system is compared to its iOS rival, there are a few quirky rules about apps in the Android Market that are not only restrictive for developers, but perhaps even for Google itself in terms of revenue.
What this means for developers is that they can’t have one-day sales on apps, or even release a brand new app for free for a week or two, before making it paid. Such behavior is commonplace in the iTunes App Store. Sure, free in the iTunes App Store means zero dollars for the developers, but the publicity surrounding the sales, and the potential of in-app purchases can really make a difference. However, in the Android Market, if developers made the mistake of changing an app to “free” for the day, then go to switch it back to, say, $0.99, they can’t. They have to create a brand new app version and re-sell it.
This is not much fun for developers (and creates confusion for consumers). One-day, or early-release sales, are a great way to rake-in publicity. That’s already been proven when top games and apps in the iTunes App Store go free, especially around holidays. No wonder we rarely see much traction, even in our very own AndroidApps price cuts section, when developers can’t even offer their apps free for a day in Google’s marketplace. It’s another reason why so many developers simply choose to offer their apps and games free and fill them with ads. That is probably a better way to generate revenue than offering them for $0.99. Google must enjoy the cut it gathers from the ads, too."
The whole article:
The Fieldrunners HD issue
"by Marty Gabel
While malware threats and copyright-infringing apps usually litter the headlines, here’s an interesting one which, admittedly, I didn’t know about until recently. Here’s section 3.3 from the Android Market Developer Distribution Agreement:
You may also choose to distribute Products for free. If the Product is free, you will not be charged a Transaction Fee. You may not collect future charges from users for copies of the Products that those users were initially allowed to download for free.
No free lunch
What this means for developers is that they can’t have one-day sales on apps, or even release a brand new app for free for a week or two, before making it paid. Such behavior is commonplace in the iTunes App Store. Sure, free in the iTunes App Store means zero dollars for the developers, but the publicity surrounding the sales, and the potential of in-app purchases can really make a difference. However, in the Android Market, if developers made the mistake of changing an app to “free” for the day, then go to switch it back to, say, $0.99, they can’t. They have to create a brand new app version and re-sell it.
This is not much fun for developers (and creates confusion for consumers). One-day, or early-release sales, are a great way to rake-in publicity. That’s already been proven when top games and apps in the iTunes App Store go free, especially around holidays. No wonder we rarely see much traction, even in our very own AndroidApps price cuts section, when developers can’t even offer their apps free for a day in Google’s marketplace. It’s another reason why so many developers simply choose to offer their apps and games free and fill them with ads. That is probably a better way to generate revenue than offering them for $0.99. Google must enjoy the cut it gathers from the ads, too.
The Fieldrunners HD issue
On Thursday, July 30, you can expect to see popular iOS game Fieldrunners finally get a release in the Android Market as Fieldrunners HD. The launch price will be $0.99. But that’s not what the developers intended. Subatomic Studios had plans to offer the game for free in the Android Market for its initial release to drum-up interest. However, like many other developers, they were stymied by Google’s rules.
I talked to Alec Shobin, PR and Marketing Manager for Subatomic Studios to find out more about this. “The Android Market is a rapidly growing and maturing distribution platform. Like any growing service they are experimenting with different functionalities in the hopes of creating something better. We have tried our best, and it is unfortunate that we could not do some of the things we had hoped to do for our customers.”
Shobin isn’t quite sure why other stores are able to let developers sell games that temporarily go free, but Google isn’t. “Despite our best intentions, the system did not allow for a free app to become paid. Hopefully these restrictions will change in the future.”
Time to open up?
Perhaps it’s time for Google to rethink some of its policies, especially if developers are still confused by the rulings. Undoubtedly, the company is making an effort to improve the user experience for customers when visiting the Android Market, but they need to do a little more to help developers. Heck, there’s not even redeemable promo codes available for developers to send out to consumers. This is a sure fire way to drum-up interest, especially if Google wants to become a bigger player in the gaming space."
Wednesday, June 29, 2011
Tuesday, June 28, 2011
Customizing the custom dialog
Ok - last night, we cleared up the issue with getting the custom dialog to say alive when the activity was being finished. Now that that's out of the way, we want to play with the look and feel of the custom dialog to get it to display some cool images when the customer advances to the next level. Let's take a look at what we have now:
Four things jump out immediately
1. Center the button
2. Get rid of the ugly orange color of the button
3. The "Congratulations" on the top is redundant
4. We need a better image.
Ok, on centering, in android, there are two kinds of centering, one for the view itself, and one for the text in the view. I've got them both, so, let's choose one from the project.
Let's try this:
android:layout_gravity="center_vertical|center_horizontal"
Fix the title while we're at it:
dialog.setTitle("");
And test it.
Ok. But, it's quickly apparent we need to center the image also
Ok, did that and adjusted the text a bit.
Now, lets's set the image. Let's find that CustomDialog tutorial on Google.
Here it is a couple of posts ago:
http://developer.android.com/guide/topics/ui/dialogs.html#CustomDialog
So, it's under Dialog, just look for CustomDialog.
And here it is:
image.setImageResource(R.drawable.android);
Ok, all I really needed to do was look at the code.
Let's set the image to one of the Lin Golden's amazing works, "Looking at the Moon-Niou"
http://www.flickr.com/photos/purestgold/4741593238/sizes/m/in/set-72157624240358587/
Hmmm; it doesn't show. Let's try making a .png (it's currently jpg).
Ok, not bad. But the image is too large - it takes up the whole page. The button is really shrunken down. Let's try a different size.
240 x 169.
Ok, that's better:
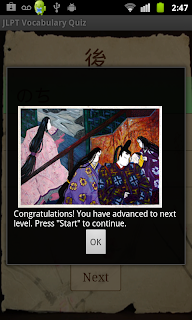
There are still some issues. Why is the background so dark? It basically black out the whole display, making some what disorienting and jarring. Also, the image is still off to the left a bit for some reason. Also, I need to identify the image and possibly create a link. Also, I need to vary the images; I would like to rotate about 10 of them. I also need to figure out how to handle the toast dialog, if they don't get all of them right. I think I'll just leave that as a toast.
There are a couple of other usability issues. You need to press this tiny button to get to the original display. Then, you have to press another button. Also, the dialog jumps out at you; I would rather a slower fade in.
I really don't like the double-touch to get to the next level. But, if I get rid of the button click, I'm back to my original problem of the dialogue immediately disappearing.
What if I make it an activity instead of a dialog? Let's to a quick test.
Add this:
import android.app.Activity;
import android.os.Bundle;
public class NextLevel extends Activity {
/** Called when the activity is first created. */
@Override
public void onCreate(Bundle savedInstanceState) {
super.onCreate(savedInstanceState);
setContentView(R.layout.next_level);
}
}
Then call the activity:
// pass control to activity
Intent i = new Intent(QuestionActivity.this,
NextLevelActivity.class);
startActivity(i);
Comment out the show dialog.
//showDialog(NEXT_LEVEL_ID);
Then, put the finish back in,
finish();
And see if the activity display hangs up there.
Ok, I haven't loaded up the image or anything, so all I'm getting is the display button. How do lookup image? Is it a view?
Here's a tutorial:
http://www.higherpass.com/Android/Tutorials/Working-With-Images-In-Android/
ImageView image = (ImageView) findViewById(R.id.test_image);
Actually, I can probably take it right from the dialog code:
CharSequence text = "Congratulations! You have advanced to next level. Press \"Start\" to continue.";
TextView nextLevelText = (TextView) dialog
.findViewById(R.id.next_level_text);
nextLevelText.setText(text);
ImageView image = (ImageView) dialog.findViewById(R.id.image);
image.setImageResource(R.drawable.a);
Actually, we need to pull the dialog and let the find by view work from activity.
Ok, well, since I've set the style of the display to Dialog in the manifest,
It now looks exactly the same as the dialog previously shown. Cool :)
Now, let's see if I can kill it with the timer...
Here's some timer code:
private CountDownTimer mCountDownTimer = null;
mCountDownTimer = new CountDownTimer(totalMsecs, callInterval) {
public void onTick(long millisUntilFinished) {
float fraction = millisUntilFinished / (float) totalMsecs;
// progress bar is based on scale of 1 to 100;
m_bar.setProgress((int) (fraction * 100));
}
public void onFinish() {
handleTimeOut();
}
}.start();
We'll modify it to only do something on finish:
CountDownTimer countDowntimer = new CountDownTimer(totalMsecs, callInterval) {
public void onTick(long millisUntilFinished) {
}
public void onFinish() {
NextLevelActivity.this.finish();
}
}.start();
And set up the params like this:
totalMsecs = 1 * 2000; // 2 seconds
callInterval = 1000;
Call it a couple of time just to make sure it doesn't hang or something.
Nice! it works. We can get rid of the variable declaration:
new CountDownTimer(totalMsecs, callInterval) {
public void onTick(long millisUntilFinished) {
}
public void onFinish() {
NextLevelActivity.this.finish();
}
}.start();
And get rid of the button and the "click next" text.
And heres what we get:
Well, for some reason it's not uploading properly right now. But, the main thing is, we got rid of the extra button push, and the clutter of the button on the display.
That's a wrap for now!
Selling items on Amazon vs. eBay
I'm going to vary from my usual programming routine to post about putting an item for sale on Amazon. We all need to make money, and there's no sense having stuff hanging around the house that you never use if you could be making a few bucks on it.
I was originally going to sell on eBay, but it turns out this particular item is already offered on Amazon. So, I want need to take photos or anything. Also, Amazon apparently takes out far fewer in fees than eBay. Well, there are conflicting reports. I was convinced by the first review on this site: http://askville.amazon.com/eBay-Amazon-place-sell-stuff/AnswerViewer.do?requestId=7778359 that it works for me. Basically, I don't have to take photos or set up the description - it's already all set up. Also, this url: http://www.amazon.com/gp/help/customer/display.html?nodeId=1161238 lists the steps, and it's looks less complicated than eBay.
In this case, the item being sold is an Escort 8500 X50 Radar detector. I used this while I was commuting along a speed trap plagued stretch of highway where the cops were real experts at nabbing you just at the spot where you let your guard down. I got three speeding tickets on it when I first started the commute, and it cost me thousands in insurance money over time. It was great to have. I didn't mind the false alarms or anything. But, I eventually learned the best way to avoid a speeding ticket is to just use cruise-control.
Luckily, my wife stored away the box and I still have the original packaging. She's so organized. I'm just bad at that kind of thing. It's like a miracle to have it still around after five year.
So, I want to double check and make sure it's still working. It's been in my drawer for a couple of years now, since the suction cup just stopped working. Also, I had it installed by a pro, and I'm not sure if the wire that connected it to the battery or whatever came with the original box or not. I definitely have the recharger chord that plugs into the cigarette lighter. There's no suction cup - it just stopped working.
Ok, I checked it out. It's working just fine. The minium used unit listed on Amazon is priced at $250 or so, which I think is about 1/2 of what I paid for it. Not bad. It's a great piece of technology, that for sure.
Ok, let's review the steps:
Create a Listing
Step By Step | Sell multiple copies | Shipping expectations
1
Search for the item you want to sell.
When you've found an exact match, click the "Sell yours here" button on the right-hand side of that page. Note: there can be several editions or formats of the same item--make sure you have the correct one.*
// Done!
You can also sell your item from Amazon.com's home page by clicking Sell Your Stuff on the navigation bar or from the Manage Inventory section of your Seller Account.
2 Describe the condition of your item.
Select the condition and enter any comments regarding the condition item. For example, the book has a scratched cover or moderate highlighting.
// done.
Guidelines for setting the condition.
3
Set your price and register to collect online payment from your buyer via Marketplace Payments by Amazon.
Subject to our General Pricing Rule and any minimum or maximum pricing limitations we may establish from time to time, you are responsible for setting the prices of the products you choose to offer on Amazon.com, and should take into account all applicable costs (including fees and shipping rates) when listing and pricing your items.
Read more about commissions and fees.
Read more about shipping credits.
// What's nice about setting the price is there are other units for sale you can compare with. You already know the range.
4 Select shipping method.
You can choose to ship orders to buyers yourself or use Amazon's fulfillment services to do ship for you. If you choose to do ship yourself, decide whether you want to offer expedited or international shipping. When you offer a certain shipping option, you can mail your order using any carrier and method, as long as the buyer receives their package within the time frame they chose.
If you choose to have Amazon ship orders for you, your listings will be eligible for FREE Super Saver Shipping, Prime, customer service, and returns. Fulfillment by Amazon (FBA) fees will apply.
// We can ship directly. I'll have to remember to check that email address everyday, though - I promised immediate shipping.
Read more about FBA.
Read more about shipping expectations below.
5
Optional: set Quantity & SKU (see below)
6
Confirm.
Review the information you have entered carefully to make sure that your listing will appear as want it to. Although you can edit certain fields in your Seller Account once your listing has been created, other fields, such as "condition," cannot be edited. If you want to change the condition, it will be necessary to close the current listing and create another.
// Done. That was ridiculously easy. Amazon is going to take about $25 for the service.
Monday, June 27, 2011
Brining the Custom Dialog under control
So, where we left off last time, I was puzzling over how to keep a Custom Dialog disappearing when the activity it belongs to goes away on a finish call. And, suddenly the old light bulb clicked on and I realized, I just have to have a listener to the custom dialog call the finish. It means it will need the customer to do some kind of gesture.
Let's google customdiaglog listener android.
It takes is to the Dialog documentation. Ok, this might be helpful.
setOnDismissListener(DialogInterface.OnDismissListener listener)
Set a listener to be invoked when the dialog is dismissed.
Now, the question is, what triggers the dismiss event?
It might be better just to show the message for a couple of seconds, just delay it with a timer or something like that. That way, there's no confusion and no buttons required. Let's go with that for now.
I think I have some timer code somewhere in the project already. For the progress bar, I think. Let's have a look.
Here it is, roughly:
totalMsecs = 10 * 1000; // 10 seconds
callInterval = 100;
/**
* CountDownTimer is for totalMsec and every onTick is callInterval
* milliseconds
*/
mCountDownTimer = new CountDownTimer(totalMsecs, callInterval) {
public void onTick(long millisUntilFinished) {
float fraction = millisUntilFinished / (float) totalMsecs;
// progress bar is based on scale of 1 to 100;
m_bar.setProgress((int) (fraction * 100));
}
public void onFinish() {
handleTimeOut();
}
}.start();
I'm questioning if this will work. If the countdown timer runs in a separate thread, then it probably no good for this purpose. Let's take a peek at the source:
http://grepcode.com/snapshot/repository.grepcode.com/java/ext/com.google.android/android/2.2_r1.1/
It has Handler, which has queues and uses synchronized calls. How can you have messaging without asynchronous processing? Anyway, you wouldn't be able to select an answer if it was blocking call. Forget it.
Ok, button it is. Let's make it very simple and standard for now. Google android button example.
It's right in the docs:
http://developer.android.com/reference/android/widget/Button.html
android:layout_width="wrap_content"
android:text="@string/self_destruct"
android:onClick="selfDestruct" />
Let's add this. Wow, I didn't know you could specify a listener method in the xml. Let's try this
android:layout_width="wrap_content"
android:text="OK"
android:onClick="myFinish" />
So, here's our new layout:
android:layout_width="wrap_content" android:layout_height="wrap_content"
android:padding="10dp">
android:textColor="#FFF" />
android:layout_width="wrap_content" android:text="OK" android:onClick="myFinish" />
And we'll take the finish call into the myFinish() method
Their example:
public void selfDestruct(View view) {
// Kabloey
}
My code:
public void myFinish(View view) {
finish();
}
Well, that just totally blew the program up - it just disappeared when I hit the next level code. Let's check out the log.
Nothing, no problem. But, when I run it again, it works fine. I can see the dialog box, and I have to press the ok button to make it go way. But, then, it dies on a "myfinish" method not found.
Let's try a more traditional approach:
Button button = (Button) dialog.findViewById(R.id.next_level_button);
button.setOnClickListener(new View.OnClickListener() {
public void onClick(View v) {
QuestionActivity.this.finish();
}
});
Bingo. It works perfectly. Tomorrow we'll tackle improving the look and feel of this.
Android - adding an enhanced dialog

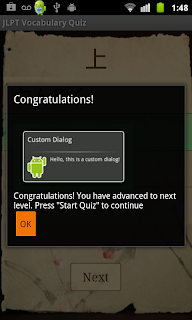
Ok. So, I have a default dialog display which says "Congratulations - you have advanced to the next level". I'm thinking, this is kind of disappointing, ad least for me, when I get it. I'd like to add an image to the message, maybe fill the screen a bit more - make it a bit more of a celebratory event.
I think I saw something about how to do that somewhere. Let's google android dialog.
Here's something:
http://developer.android.com/guide/topics/ui/dialogs.html
AlertDialog
A dialog that can manage zero, one, two, or three buttons, and/or a list of selectable items that can include checkboxes or radio buttons. The AlertDialog is capable of constructing most dialog user interfaces and is the suggested dialog type. See Creating an AlertDialog below.
http://developer.android.com/guide/topics/ui/dialogs.html#AlertDialog
No image there, just displaying yes/no buttons and adding lists and radio buttons.
How about googling "Android Dialog image"
http://www.coderanch.com/t/493136/Android/Mobile/Adding-image-AlertDialog
Here the good fellow recommends:
or the last and easiest option would be to create a custom dialog interface using xml, and use the android api for layout inflating.
http://developer.android.com/guide/topics/ui/dialogs.html#CustomDialog
Ah, yes, that's what I as looking for.
Creating a Custom Dialog
If you want a customized design for a dialog, you can create your own layout for the dialog window with layout and widget elements. After you've defined your layout, pass the root View object or layout resource ID to setContentView(View).
Nice, there's a nice example right there:
For example, to create the dialog shown to the right:
Create an XML layout saved as custom_dialog.xml:
android:orientation="horizontal"
android:layout_width="fill_parent"
android:layout_height="fill_parent"
android:padding="10dp"
>
android:layout_height="fill_parent"
android:layout_marginRight="10dp"
/>
android:layout_height="fill_parent"
android:textColor="#FFF"
/>
This XML defines an ImageView and a TextView inside a LinearLayout.
Set the above layout as the dialog's content view and define the content for the ImageView and TextView elements:
Context mContext = getApplicationContext();
Dialog dialog = new Dialog(mContext);
dialog.setContentView(R.layout.custom_dialog);
dialog.setTitle("Custom Dialog");
TextView text = (TextView) dialog.findViewById(R.id.text);
text.setText("Hello, this is a custom dialog!");
ImageView image = (ImageView) dialog.findViewById(R.id.image);
image.setImageResource(R.drawable.android);
Nice. Let's create the layout - call it NextLevelDialog. Cool, eclipse even provides an new XML Layout, or the Android add-in, I guess.
Oops, forgot, these files can only have lowercase names. Let's call it next_level.
Ok, where in the code to I all that alert? Somewhere in QuestionActivity, no doubt.
There it is:
appState.incrementQuizStartAndFinish(this);
text = "Congratulations! You have advanced to next level. Press \"Start\" to continue";
Toast.makeText(getApplicationContext(), text, Toast.LENGTH_LONG)
.show();
Ok.
After you instantiate the Dialog, set your custom layout as the dialog's content view with setContentView(int), passing it the layout resource ID. Now that the Dialog has a defined layout, you can capture View objects from the layout with findViewById(int) and modify their content.
That's it. You can now show the dialog as described in Showing A Dialog.
http://developer.android.com/guide/topics/ui/dialogs.html#ShowingADialog
It looks like this ought to do it:
When it's time to show one of the dialogs, call showDialog(int) with the ID of a dialog:
showDialog(DIALOG_PAUSED_ID);
So, here's the code:
appState.incrementQuizStartAndFinish(this);
text = "Congratulations! You have advanced to next level. Press \"Start Quiz\" to continue";
Context mContext = getApplicationContext();
Dialog dialog = new Dialog(mContext);
dialog.setContentView(R.layout.next_level);
dialog.setTitle("Congratulations!");
TextView nextLevelText = (TextView) dialog.findViewById(R.id.next_level_text);
nextLevelText.setText(text);
ImageView image = (ImageView) dialog.findViewById(R.id.image);
image.setImageResource(R.drawable.dialog_custom);
showDialog(R.layout.next_level);
Let's run it...
Nothing. Add back in the Toast display and it shows. Am I not correctly displaying it? Yes, I am not. It's a bit more complicated than the resource identifier.
Showing a Dialog
A dialog is always created and displayed as a part of an Activity.
//k
You should normally create dialogs from within your Activity's onCreateDialog(int) callback method.
//k
When you use this callback, the Android system automatically manages the state of each dialog and hooks them to the Activity, effectively making it the "owner" of each dialog.
//k
As such, each dialog inherits certain properties from the Activity.
//k
For example, when a dialog is open, the Menu key reveals the options menu defined for the Activity and the volume keys modify the audio stream used by the Activity.
// for all dialogs?
When you want to show a dialog, call showDialog(int) and pass it an integer that uniquely identifies the dialog that you want to display.
// that's the ticket.
When a dialog is requested for the first time, Android calls onCreateDialog(int) from your Activity, which is where you should instantiate the Dialog.
// that's where I'm instantiating it.
This callback method is passed the same ID that you passed to showDialog(int). After you create the Dialog, return the object at the end of the method.
// oh. I'm confused. What is the callback method they're referring to? It must be the onCreateDialog(int), which is called when I call showDialog(int). But, after I create the dialog, I'm supposed to return the dialog object at the end of the method. The method I create it in? But, that's just some random method with a void return.
Ah here's a key piece which I initially didn't bother to pull in:
Note: If you decide to create a dialog outside of the onCreateDialog() method, it will not be attached to an Activity. You can, however, attach it to an Activity with setOwnerActivity(Activity).
This means I need to define the dialog in the onCreateMethod. To continue:
Before the dialog is displayed, Android also calls the optional callback method onPrepareDialog(int, Dialog).
// ok
Define this method if you want to change any properties of the dialog each time it is opened.
// I could use this if I want to display random images instead of the same one every
// time.
This method is called every time a dialog is opened, whereas onCreateDialog(int) is only called the very first time a dialog is opened.
// a-ha.
If you don't define onPrepareDialog(), then the dialog will remain the same as it was the previous time it was opened.
// Got it. I don't mind over-explaining things one bit. This is good documentation.
This method is also passed the dialog's ID, along with the Dialog object you created in onCreateDialog().
// ok. Still a bit hazy on how the id plays a role, though.
The best way to define the onCreateDialog(int) and onPrepareDialog(int, Dialog) callback methods is with a switch statement that checks the id parameter that's passed into the method.
// Sound good.
Each case should check for a unique dialog ID and then create and define the respective Dialog. For example, imagine a game that uses two different dialogs: one to indicate that the game has paused and another to indicate that the game is over.
// Right.
First, define an integer ID for each dialog:
static final int DIALOG_PAUSED_ID = 0;
static final int DIALOG_GAMEOVER_ID = 1;
// Ok.
Then, define the onCreateDialog(int) callback with a switch case for each ID:
protected Dialog onCreateDialog(int id) {
Dialog dialog;
switch(id) {
case DIALOG_PAUSED_ID:
// do the work to define the pause Dialog
break;
case DIALOG_GAMEOVER_ID:
// do the work to define the game over Dialog
break;
default:
dialog = null;
}
return dialog;
}
// Ok. I see. It's a mechanism for deciding which dialog to display.
Note: In this example, there's no code inside the case statements because the procedure for defining your Dialog is outside the scope of this section. See the section below about Creating an AlertDialog, offers code suitable for this example.
// Ok.
When it's time to show one of the dialogs, call showDialog(int) with the ID of a dialog:
showDialog(DIALOG_PAUSED_ID);
Ok, this is great. I might even show a different dialog for when they don't get to
next level. Or I might just leave it as a toast. This will be a great
place to put in ads. What the word - inter...something.
First, let's set up a couple of ints:
static final int SAME_LEVEL_ID = 0;
static final int NEXT_LEVEL_ID = 1;
And the method:
protected Dialog onCreateDialog(int id) {
Dialog dialog = null;
switch (id) {
case SAME_LEVEL_ID:
// do the work to define the pause Dialog
break;
case NEXT_LEVEL_ID:
AppState appState = (AppState) this.getApplication();
appState.incrementQuizStartAndFinish(this);
String text = "Congratulations! You have advanced to next level. Press \"Start Quiz\" to continue";
Context mContext = getApplicationContext();
dialog = new Dialog(mContext);
dialog.setContentView(R.layout.next_level);
dialog.setTitle("Congratulations!");
TextView nextLevelText = (TextView) dialog
.findViewById(R.id.next_level_text);
nextLevelText.setText(text);
ImageView image = (ImageView) dialog.findViewById(R.id.image);
image.setImageResource(R.drawable.dialog_custom);
break;
default:
dialog = null;
}
return dialog;
}
And the call:
showDialog(NEXT_LEVEL_ID);
Let's try it again...
Crash. View the log...
W/WindowManager( 96): Attempted to add window with non-application token WindowToken{40705a40 token=null}. Aborting.
E/AndroidRuntime( 3354): FATAL EXCEPTION: main
E/AndroidRuntime( 3354): android.view.WindowManager$BadTokenException: Unable to add window -- token null is not for an app
That's a break from the usual NPE, at least.
Let's google this...
http://stackoverflow.com/questions/1561803/android-progressdialog-show-crashes-with-getapplicationcontext
It's a popular question, 26 upvotes.
The highest rated answer suggest:
dialog = new Dialog(this);
Instead of
Context mContext = getApplicationContext();
dialog = new Dialog(mContext);
Let's try it:
Yes. That was it. It flashed by because I finish immediately afterwards, but I spotted the little green android dude. But, what was the cause of the problem? It was pulling the wrong context. It must be a superclass's context.
Ok. So, how do I keep it up there? Require an answer?
Probably one button which says ok. How do I add it?
Let's go back to the alert documentation. It had the buttons in there.
http://developer.android.com/guide/topics/ui/dialogs.html#AlertDialog
It looks like it's a bit different:
AlertDialog.Builder builder = new AlertDialog.Builder(this);
builder.setMessage("Are you sure you want to exit?")
.setCancelable(false)
.setPositiveButton("Yes", new DialogInterface.OnClickListener() {
public void onClick(DialogInterface dialog, int id) {
MyActivity.this.finish();
}
})
.setNegativeButton("No", new DialogInterface.OnClickListener() {
public void onClick(DialogInterface dialog, int id) {
dialog.cancel();
}
});
AlertDialog alert = builder.create();
I'm pretty sure there's not setPositive/Negative...
Nope. I'll have to add the button in the layout. Then add a listener. There's no add listener method, but I thought I saw something somewhere with an listener to a custom dialog.
Google custom dialog listener android
It brings me to the dialog doc at http://developer.android.com/reference/android/app/Dialog.html
This is what I'm looking for,
setOnShowListener(DialogInterface.OnShowListener listener)
Sets a listener to be invoked when the dialog is shown.
But I don't see why having a listener will cause the dialog to stay on the screen.
Ok, I'll have to check into this. I'll pick this up later.
Android advertising - Jumptap part duex
Ok. So, now that we have read the docs, let's find the code for incorporating the Jumptap API. How about we search "jumptap sample code"?
Here's a url about conversion tracking.
About Jumptap Conversion Tracking
But that's not where I want to go right now. How about the main page?
http://www.jumptap.mobi/index.php/Main_Page
That's better. How about this:
http://www.jumptap.mobi/index.php/Publisher_integration_guide
Oops. That's the one I just analyzed in the last post. I think one of the problems is that it's for multiple languages. Still, it's hard to believe they don't have sample code.
Ah, here we go:
http://www.jumptap.mobi/index.php/Jumptap_Android_SDK_Integration
This wiki page describes the JumpTap Android (JtAdView) ad library installation and use for Android developers. The current version of the library (1.1.10.4) is compatible with SDK 1.5 (API 3).
Downloading the library
Click here to download the latest version of the library (version 2.1.10.2, released 6/24/2011) ->
// ok - here we go. Downloading JTAdTag.zip. Dump it into software folder. Ok, it's a jar file.
Installation
To use the library, add the Jumptap library (jar file) to your project.
Ok, move the jar to my "software/externaljars" directory. Add it to Eclipse - project, properties, build, add external jars, something like that.
Ok, now, commit in case I didn't do it last time and tag "BeforeJumptap"
Oh, right, the svn tag isn't working - I think. Here's the error.
Tag operation for some of selected resources failed.
svn: Commit failed (details follow):
svn: No write-lock in '/Users/markdonaghue/Documents/workspace/JlptQuizApp/res/layout'
I think it's an eclipse issue. You can get around it with the svn command line, but I don't want to get sidetracked right now. Let's resume:
Using the Library
Permissions
Add the following permissions to AndroidManifest.xml:
The ACCESS_COARSE_LOCATION permission allows location information to be sent to Jumptap, so that location targeted ads can be served to your app. If you do not wish to receive location targeted ads, this permission may be omitted.
// Good. Let's go ahead and add these to the manifest. Actually, most of them
// were there already. Why? I must have tried something at some point. Well, I need
// the internet for the audio download, but none of the rest. Well, I do now.
// Next up:
Initialization
Using the XML file:
android:id="@+id/ad" jumptapLib:publisherId="add your publisher id"
jumptapLib:siteId="add your site id" jumptapLib:spotId="add your spot id"
/>
// This is the layout. Cool. Now we're getting somewhere. But, before I put it in:
Note: Make sure that you have the XML name space declaration for the Jumptap Library in your 'LinearLayout' tag of your XML file. Name space declaration for the Jumptap Library: xmlns:jumptapLib="http://www.jumptap.com/lib/android".
// Ok, I can do that to. But first:
Using Java code:
JtAdWidgetSettings s = JtAdWidgetSettingsFactory.createWidgetSettings();
s.setPublisherId(your publisher id);
s.setSpotId(your ad spot id);
s.setSiteId(your site id);
JtAdView adView = new JtAdView(TestActivity.this, s);
So, I need to know what these parameters are. Do I have to be published first? Do I have them already? Can I get them from the API already? I'm confused. Let's go back to the original email:
Setup your mobile site/app to display ads and start earning money:
1. Log-in to your account. (http://www.jumptap.com)
2. Add a site/app to your Jumptap account.
3. Install ad code. We provide you with the sample code needed to display ads. You simply integrate it into your site/app.
4. Site approval. In 1-2 days you will receive an email confirming if your site has been approved. Once approved, your site will be ready to display ads!
Ok, so, the email header says: "Your Jumptap Account has been approved"
But, it doesn't say my site/app, which is as yet unpublished, has been approved. So, what I will need to do is integrate the code, publish the app, and then see what happens? It all seems a bit risky. Also, how will I communicate the site to them, as I've already done step 2. But, I just have a web site for the launching page, not the app url on the Android Marketplace. For that, I specified "not yet published", which was an option they had.
Well; let's go ahead and try to install the code. I can always back it it out. Hmm...I just noticed the XML even specifies these parameters:
jumptapLib:publisherId="add your publisher id"
jumptapLib:siteId="add your site id" jumptapLib:spotId="add your spot id" />
Hmmm...I logged into my profile, and the app I added is missing. That's probably for the better, because I put in the launching page for the app instead of the actual url, which doesn't exist yet.
I get the feeling things will go a bit smoother if I just publish the app first, then add the jumptap code. I'm probably going to do that first. Maybe I'll send an email to support.
Well, they say here under support:
While you wait...
You can setup your mobile property to display ads while you wait for your Account Approval email. Add a Site/App to your account.
Still, I don't have the url to add. I'll send an email to support and bag it for now.
Android advertising - incorporating JumpTap, Part 1
Ok. The time has come to figure out how to incoporate Jumptap into my app. Let's look at the emails they sent out:
Ok, here's the main one:
Setup your mobile site/app to display ads and start earning money:
1. Log-in to your account. (http://www.jumptap.com)
2. Add a site/app to your Jumptap account.
3. Install ad code. We provide you with the sample code needed to display ads. You simply integrate it into your site/app.
4. Site approval. In 1-2 days you will receive an email confirming if your site has been approved. Once approved, your site will be ready to display ads!
I've done #1 and #2. So, now the question becomes - how to install the ad code? Where is all this sample code they speak of? A link guys, a link. I know you're busy and all...
Anyway, let's go to the site.
It's tough to actually get their site - all sorts of articles and whatnot come first. However, this url looks promising:
https://support.jumptap.com/index.php/Publisher_integration_guide
Let's take a look:
Jumptap's tapLink system provides a single interface for mobile operators and publishers to retrieve display ads from the Jumptap ad network.
This page applies to the current version of the tapLink API - version 2.9.
This wiki page describes how publishers and mobile operators retrieve banner ads via the tapLink API.
// ok.
Ad Request API
The tapLink API allows mobile web publishers and application developers to request display ads via a server-side call mechanism.
To request an ad, the publishing server makes a server-to-server invocation of the Jumptap Ad Service via a REST-style web-interface.
The resultant XHTML markup is then displayed in the end user's browser page or application.
// ok.
Requesting an ad
Ad requests to tapLink must be made on a just-in-time basis; in other words, an ad should be requested as the page on which the ad will be displayed is being built.
// ok
tapLink does not support pre-fetching of advertising for future display.
Ad requests to the Jumptap API comprise:
A simple HTTP GET request of the form:
http://a.jumptap.com/a/ads?
// ok
HTTP headers forwarded from the originating handset.
// Ok, I think.
The XJT-UserId header.
// How do I get that?
Structuring the GET Request
Starting with the base URI, add the required request parameters plus any optional parameters that you can provide.
Note that:
Parameter/value pairs are separated from each other with the '&' character.
The order of the parameter/value pairs in the query string is not important.
All parameter values must be URL-encoded.
// how? I'm sure they will suggest it. Java certainly has that capability.
It is not necessary to pass parameters for values that you are already sending as headers.
For example, if you are sending the user-agent header from the device, you do not need to pass the ua parameter.
// how do I know if I'm doing that?
You do not need to pass the same parameters with every request.
For example, if postal code is only available on particular pages of your site, then the requests from those pages would include "&pc=&country=" whereas requests from other pages would not.
// That's good.
Do not pass a null value or an empty string for parameters for which you do not have values. Instead, leave such parameters out of the query string altogether.
// ok
The template of an ad request containing all possible parameters is below. Note that this is not actually a valid request as it does not contain any values for the defined parameters.
http://a.jumptap.com/a/ads?v=&pub=&site=&spot=&a=&url=&ua=&gateway-ip&client-ip=&operator=&l=&ll=&pc=&country=&u=&hid=&mt-gender=&mt-age=&mt-hhi=
// ok.
Passing Client Headers
In order to perform various functions including handset identification, operator/carrier resolution, geographic targeting, and frequency capping, the HTTP headers from the originating (handset) client must be passed along with each ad request.
With a few specific exceptions, all headers – including the Accept* headers – should be forwarded to Jumptap. The following headers should be explicitly excluded:
Host:
Keep-Alive:
Connection:
Cookie:
Cache-Control:
Content-Length:
// I guess they will show us how to do this with sample code.
Passing the XJT-UserId Header
In order to allow taplink to identify and track unique users on your site, tapLink issues a cookie containing a unique user ID. This unique ID is passed to / from tapLink via the XJT-UserId header.
// so, it's basically a header for the cookie.
For more information regarding how to set and send the cookie, please refer to The tapLink Cookie.
Passing IPs
tapLink uses IP addresses to determine several pieces of information about an ad request, including:
The mobile operator from whose network the ad request was made. This allows advertisers to carrier-target their campaigns.
// no problem.
The country from which the ad request was made. This allows advertisers to country-target their campaigns.
// sure.
If you are able to forward device headers with the ad request and you have the ability to modify the headers, then you will need to manipulate the x-forwarded-for header as if you were a proxy:
// oh...
// What's this "x-forwarded-for" header?
If the x-forwarded-for header is present in the headers from the device and has a non-zero length then append "," to the end of it prior to forwarding it Jumptap.
// Well, ok, I'm not sure how this all works yet. How am I going to intercept all
// this stuff.
If x-forwarded-for has a zero-length or is not present in the headers from the device, then set it to "" without the comma.
// Set it? if it's not there, then what do I set? This is getting steep very quickly...
If you are able to forward device headers with the ad request but you cannot modify the headers, then:
// Condition 2. Ah, I see; the ad request is what you generate for Jumptap.
Forward the x-forwarded-for header as-is to Jumptap
Include the client-ip parameter in the query string of the ad request and set it to "".
// Am I picking up the client IP with Java code?
If you are not able to forward device headers, then:
Include the gateway-ip parameter in the query string of the ad request and set it to the x-forwarded-for header from the device.
Include the client-ip parameter in the query string of the ad request and set it to "".
// Ok. This is really detailed. I guess it's good, but I'm hoping a lot of this will
// be handled by the sample code.
In all cases above, refers to the IP address of the client invoking you. This IP which can be obtained from the HTTP implementation you are using.
// I thought the IP was carried in the IP header.
For more information regarding the x-forwarded-for header, please refer to Wikipedia: http://en.wikipedia.org/wiki/x-forwarded-for.
// Here we go:
The X-Forwarded-For (XFF) HTTP header field is a de facto standard for identifying the originating IP address of a client connecting to a web server through an HTTP proxy or load balancer. This is a non-RFC-standard request field which was introduced by the Squid caching proxy server's developers.
// Ok, so, this is how they get the ip. But since I'm sending from the device directly
// on the network, how does the ip work? Is the ip a public ip? Is it ipv4 or ipv6?
// Certainly the device doesn't have its own pulic ip address, unless it's ipv6.
Required Request Information
Parameter HTTP Header Required Description
gateway-ip x-forwarded-for Y A series of IPs associated with the ad request.
Please refer to the Passing IPs section above for further detail.
// Ok, they covered this.
hid Y The unique device hardware ID.
This parameter is only required for iPhone and Android applications, not mobile web sites.
// why not mobile web apps?
This parameter is used for conversion tracking and is necessary in order to determine campaign coverage.
Example of iPhone (40-character alphanumeric value):
483a269b72ab8bc5d4a5fe0659c90f4808ce615b
Example of Android (16-character alphanumeric value): 20014303ca716d69
// ok.
l Accept-Language Y The user’s preferred language. Valid values are the ISO-639-1 2 letter language codes. http://en.wikipedia.org/wiki/List_of_ISO_639-1_codes
// ok. I hope they don't make me look this up...anyway, the 2-letter code is en per the link.
pub Y Your publisher alias as assigned by Jumptap.
// ok. Do I have one yet?
site Y A site alias assigned by Jumptap.
// ok. Do I have one yet?
spot Y An ad spot alias assigned by Jumptap.
// how do I get that?
url Y/N The URL of the page requesting the ad.
// how does an app have a url?
Note that this is not the Referer header (which may reference the previous page), but is rather the URL of the page on which the ad will be displayed.
The value of this parameter must be encoded.
This parameter is required for requests from mobile web sites, but not for requests from applications.
// right.
ua User-Agent Y The user-agent of the handset making the request.
tapLink uses this to identify the handset making the request thus allowing us to serve handset-targeted campaigns and to insure that the correct size ad is returned.
When using the ua parameter, the value must be encoded; do not encode the user-agent HTTP header.
For Opera Mini, the user agent of the handset is passed in the X-OperaMini-Phone-UA header. If you are passing the user agent in the ua parameter, this is the value you must use for Opera Mini requests. If you are passing the request headers, Jumptap will automatically resolve the handset for Opera Mini requests.
// That's ensure, no insure. What's opera mini? The opera browser on the handset?
// How does the interaction with jumptap work? Am I somehow going through a browser
// or something? I don't get it yet.
Optional Request Information
Parameter HTTP Header Required Description
a N Indicates whether adult ads are allowed to be returned in response to the ad request.
By default, adult ads are not returned; they must be specifically requested by the publisher.
Valid values include:
"notallowed" - indicates that adult ads may not be returned. This is the default value for the parameter.
"allowed" - indicates that adult ads may be returned; note that the returned ad may or may not be adult.
"only" - indicates that only adult ads should be returned.
// ok, we can ignore that. This is a family app.
client-ip N The IP Address of the device requesting the ad. This is used by tapLink and our Ad Providers for Carrier/Gateway targeting. Please refer to the Passing IPs section above for further detail.
// ok, we covered that above.
country Y/N The two letter ISO country code of the originating user’s request. http://en.wikipedia.org/wiki/ISO_3166-1_alpha-2.
Country should be passed only if the country of the user originating the ad request is definitively known; it should not be set for a static value for all of your requests.
If country is not included in the request, Jumptap will automatically determine the country based on the user or gateway IP.
The country parameter is required if the postal code (pc) parameter is passed.
If you are passing latitude/longitude, then the country parameter should not be passed.
// Let Jumptap handle that.
ll N Latitude/Longitude
Latitude and longitude must be comma-separated.
The value of this parameter must be encoded.
Example, ll=42.369%2C-71.075
Latitude/Longitude is preferred to and supersedes the postal code and country parameters.
// Hmmm...I could grab that with the GPS function. It will make the ads more tailored.
mt-age N The user's age in years, if known. Valid values include any integer from 1-199.
// No, I'm not going to make the user enter that.
mt-gender N The user's gender, if known. Valid values are 'm' or 'f'
// no.
mt-hhi N The user's household income in thousands, if known.
// no
Valid values include
000_015
Where household income is less than $15,000
015_020
Where household income is $15,000-$19,999
020_030
Where household income is $20,000-$29,999
030_040
Where household income is $30,000-$39,999
040-050
Where household income is $40,000-$49,999
050-075
Where household income is $50,000-$74,999
075-100
Where household income is $75,000-$99,999
100_125
Where household income is $100,000-$124,999
125_150
Where household income is $125,000-$149,999
150_OVER
Where household income is $150,000 or higher
// no
operator N For publishers having on-deck instances of their sites, this parameter should be used to indicate the on-deck mobile operator.
This parameter should be passed only for on-deck instances for which the operator/carrier is definitively known.
For off-deck requests, Jumptap will determine the operator based on request header and gateway IP information.
See Valid Operators for a list of valid operators.
// I don't even know what on-deck/off-deck means yet. I'll ignore it for now.
pc N Postal code
If you are passing latitude/longitude, then the pc parameter should not be passed.
The value of this parameter must be encoded.
If postal code is included in the request, the country parameter is required.
Example: pc=02141&country=us
// ignore for now.
q N For search sites or applications, pass the search terms using the q ("query") parameter.
The value of this parameter should be encoded.
// not a search app.
Referer N The Referer HTTP header.
Note that this is not the URL of the page making the request but rather the previous page.
There is not currently a parameter that corresponds to the Referer header.
// well I guess we don't need to worry about that one.
u ClientID
x-up-subno
x-msisdn
XID
etc
N Unique id of the end-user. tapLink uses this identifier for frequency capping.
Different mobile operators use different headers to pass user information, and as such, we strongly recommend that you forward the device's HTTP headers so that tapLink can determine which header contains the user ID.
Only in cases in which you cannot pass headers should you create your own algorithm to determine which header contains the user ID.
In the specific case in which you are unable to forward the device headers and you cannot create an algorithm to check for user ID within the various possible parameters and your site requires a login, you may pass the hashed login ID in the u parameter.
Please note that the value that you pass in must be unique for each user, but should be consistent for each request from the same user.
// Let's hope we can forward the headers for now. Android runs on a lot of devices.
v Y Version of the Jumptap tapLink API. Currently 'v29' (Version 2.9).
// ok.
Common Errors
HTTP Headers
Not passing HTTP headers.
// let's pass them.
Passing the publishing server's HTTP headers rather than those of the handset.
// Ok. How do I distinguish/retrieve the handset headers?
User-agent
Not encoding the user-agent when passing it in the ua parameter.
// ok.
Double-encoding the user-agent when passing it in the ua parameter.
// ok.
Passing the user-agent of the publisher server rather than the handset.
// ok.
Latitude / Longitude
Not comma-separating the latitude and longitude values.
Not encoding the latitude,longitude.
// ok
Postal Code
Not encoding the postal code.
Not including the country parameter when the postal code is passed.
// ok
Country
Passing a static value with every ad request.
Passing the complete name of the country rather than the two-digit code.
// ok
Display Errors
Not accounting for an empty ad response (e.g. not collapsing the placeholder when no ad is returned).
// ok.
In an iPhone app, not accounting for both supported ad sizes: 300 x 50, 320 x 50.
// ok.
In any application, not setting aside enough vertical space for the banner
// ok.
Response Format
Ads returned from tapLink are valid XHTML. There are a number of benefits to XHTML, each of which makes your inventory more valuable to advertisers:
Using XHTML allows us to accommodate the richer ad units that advertisers are now requesting, including Javascript and rich media ads for those handsets that support them.
// That's good.
Using XHTML allows us to introduce tracking pixels to our ad responses.
// ok.
Using XHTML allows us to introduce additional ad types and functionality in the future without requiring a modification to your integration.
// That's definitely good.
Adding Style Information
Style information can be added to the response by wrapping it in div tags. Common style changes include centering the banner, centering the text below a banner, and changing the color of text below a banner.
// Ok. Man, this sounds complicated. Admob is supposed to be really easy.
Handling the Response
Ad responses are to be displayed in-whole, without modification. Parsing or otherwise modifying the response may lead to unexpected and / or undesired behavior. For example, parsing the image and click may cause you to ignore tracking pixels also contained in the response, thus rendering your site ineligible for third-party tracked campaigns.
// ok.
Handling the Response
Ad responses are to be displayed in-whole, without modification. Parsing or otherwise modifying the response may lead to unexpected and / or undesired behavior. For example, parsing the image and click may cause you to ignore tracking pixels also contained in the response, thus rendering your site ineligible for third-party tracked campaigns.
Banner Type Example Handsets Notes
iPhone Interstitial Apple iPhone / iTouch
Dimensions: 320 x 415 pixels
Supported file types: .gif, .png, .jpg
// I forgot what Interstitial means...between levels, something like that.
iPhone Optimized Banner Apple iPhone / iTouch
Dimensions: 320 x 50 pixels
Supported file types: .gif, .png, .jpg
// Ok, we're not on iPhone yet anyway.
X-Large Banner
Apple iPhone/iTouch
Google G1
Nokia E70
Palm Treo 700p
Dimensions: 300 x 50 pixels
Supported file types: .gif, .png, .jpg
// ok. What's G1? It must run Android.
Large Banner
LG VX-8500 Chocolate
Samsung MM-A900
Dimensions: 216 x 36 pixels
Supported file types: .gif, .png, .jpg
// Ok, funny how they get very specific on the phones. Do I have to worry
// about this?
Medium Banner
LG VX-8000
Motorola RAZRs
Motorola ROKR E1
Dimensions: 168 x 28 pixels
Supported file types: .gif, .png, .jpg
Small Banner
Motorola V195
Dimensions: 120 x 20 pixels
Supported file types: .gif, .png, .jpg
Call-to-action text for banners
All
Dimensions:
24 characters X-Large
18 characters Large
12 characters Medium
10 characters Small
Supported: text, accented characters
Sample Responses
Standard Text Banner
(Couldn't post the html)
HTTP Status Codes
Status Code Description
200 Response indicating that the request completed successfully.
201 This response code is returned when activity reporting events are logged successfully with tapLink.
400 A bad request status is send when not all the required parameters are provided or if any one of the required parameters contains an invalid parameter.
401 Sent when incorrect credentials are sent with the request.
403 Sent when IP restrictions are in effect.
404 Sent when the ad spot or ad provider does not exist.
500 Sent when there is an unexpected server-side error.
503 Sent when the service is currently unavailable.
// Standard error codes.
Timeouts
The publisher is responsible for dealing with errors returned from tapLink. The publisher is also responsible for setting the appropriate socket, connection and read/idle timeout values on their client application to protect themselves from a possible tapLink outage.
The publisher should work with Jumptap to determine the proper timeout values and retry policy based on the type of application the publisher has developed. Setting these timeouts will vary depending on the underlying HTTP client library implementation.
// This whole thing looks pretty complicated. Work with Jumptap?
Ok. That's an kind of in-depth view of what's involved in the interface, and
gives a good background. But, what about sample code? I'm concerned about the possible complexity. We'll tackle that in our next post.
Ok, here's the main one:
Setup your mobile site/app to display ads and start earning money:
1. Log-in to your account. (http://www.jumptap.com)
2. Add a site/app to your Jumptap account.
3. Install ad code. We provide you with the sample code needed to display ads. You simply integrate it into your site/app.
4. Site approval. In 1-2 days you will receive an email confirming if your site has been approved. Once approved, your site will be ready to display ads!
I've done #1 and #2. So, now the question becomes - how to install the ad code? Where is all this sample code they speak of? A link guys, a link. I know you're busy and all...
Anyway, let's go to the site.
It's tough to actually get their site - all sorts of articles and whatnot come first. However, this url looks promising:
https://support.jumptap.com/index.php/Publisher_integration_guide
Let's take a look:
Jumptap's tapLink system provides a single interface for mobile operators and publishers to retrieve display ads from the Jumptap ad network.
This page applies to the current version of the tapLink API - version 2.9.
This wiki page describes how publishers and mobile operators retrieve banner ads via the tapLink API.
// ok.
Ad Request API
The tapLink API allows mobile web publishers and application developers to request display ads via a server-side call mechanism.
To request an ad, the publishing server makes a server-to-server invocation of the Jumptap Ad Service via a REST-style web-interface.
The resultant XHTML markup is then displayed in the end user's browser page or application.
// ok.
Requesting an ad
Ad requests to tapLink must be made on a just-in-time basis; in other words, an ad should be requested as the page on which the ad will be displayed is being built.
// ok
tapLink does not support pre-fetching of advertising for future display.
Ad requests to the Jumptap API comprise:
A simple HTTP GET request of the form:
http://a.jumptap.com/a/ads?
// ok
HTTP headers forwarded from the originating handset.
// Ok, I think.
The XJT-UserId header.
// How do I get that?
Structuring the GET Request
Starting with the base URI, add the required request parameters plus any optional parameters that you can provide.
Note that:
Parameter/value pairs are separated from each other with the '&' character.
The order of the parameter/value pairs in the query string is not important.
All parameter values must be URL-encoded.
// how? I'm sure they will suggest it. Java certainly has that capability.
It is not necessary to pass parameters for values that you are already sending as headers.
For example, if you are sending the user-agent header from the device, you do not need to pass the ua parameter.
// how do I know if I'm doing that?
You do not need to pass the same parameters with every request.
For example, if postal code is only available on particular pages of your site, then the requests from those pages would include "&pc=&country=" whereas requests from other pages would not.
// That's good.
Do not pass a null value or an empty string for parameters for which you do not have values. Instead, leave such parameters out of the query string altogether.
// ok
The template of an ad request containing all possible parameters is below. Note that this is not actually a valid request as it does not contain any values for the defined parameters.
http://a.jumptap.com/a/ads?v=&pub=&site=&spot=&a=&url=&ua=&gateway-ip&client-ip=&operator=&l=&ll=&pc=&country=&u=&hid=&mt-gender=&mt-age=&mt-hhi=
// ok.
Passing Client Headers
In order to perform various functions including handset identification, operator/carrier resolution, geographic targeting, and frequency capping, the HTTP headers from the originating (handset) client must be passed along with each ad request.
With a few specific exceptions, all headers – including the Accept* headers – should be forwarded to Jumptap. The following headers should be explicitly excluded:
Host:
Keep-Alive:
Connection:
Cookie:
Cache-Control:
Content-Length:
// I guess they will show us how to do this with sample code.
Passing the XJT-UserId Header
In order to allow taplink to identify and track unique users on your site, tapLink issues a cookie containing a unique user ID. This unique ID is passed to / from tapLink via the XJT-UserId header.
// so, it's basically a header for the cookie.
For more information regarding how to set and send the cookie, please refer to The tapLink Cookie.
Passing IPs
tapLink uses IP addresses to determine several pieces of information about an ad request, including:
The mobile operator from whose network the ad request was made. This allows advertisers to carrier-target their campaigns.
// no problem.
The country from which the ad request was made. This allows advertisers to country-target their campaigns.
// sure.
If you are able to forward device headers with the ad request and you have the ability to modify the headers, then you will need to manipulate the x-forwarded-for header as if you were a proxy:
// oh...
// What's this "x-forwarded-for" header?
If the x-forwarded-for header is present in the headers from the device and has a non-zero length then append ",
// Well, ok, I'm not sure how this all works yet. How am I going to intercept all
// this stuff.
If x-forwarded-for has a zero-length or is not present in the headers from the device, then set it to "
// Set it? if it's not there, then what do I set? This is getting steep very quickly...
If you are able to forward device headers with the ad request but you cannot modify the headers, then:
// Condition 2. Ah, I see; the ad request is what you generate for Jumptap.
Forward the x-forwarded-for header as-is to Jumptap
Include the client-ip parameter in the query string of the ad request and set it to "
// Am I picking up the client IP with Java code?
If you are not able to forward device headers, then:
Include the gateway-ip parameter in the query string of the ad request and set it to the x-forwarded-for header from the device.
Include the client-ip parameter in the query string of the ad request and set it to "
// Ok. This is really detailed. I guess it's good, but I'm hoping a lot of this will
// be handled by the sample code.
In all cases above,
// I thought the IP was carried in the IP header.
For more information regarding the x-forwarded-for header, please refer to Wikipedia: http://en.wikipedia.org/wiki/x-forwarded-for.
// Here we go:
The X-Forwarded-For (XFF) HTTP header field is a de facto standard for identifying the originating IP address of a client connecting to a web server through an HTTP proxy or load balancer. This is a non-RFC-standard request field which was introduced by the Squid caching proxy server's developers.
// Ok, so, this is how they get the ip. But since I'm sending from the device directly
// on the network, how does the ip work? Is the ip a public ip? Is it ipv4 or ipv6?
// Certainly the device doesn't have its own pulic ip address, unless it's ipv6.
Required Request Information
Parameter HTTP Header Required Description
gateway-ip x-forwarded-for Y A series of IPs associated with the ad request.
Please refer to the Passing IPs section above for further detail.
// Ok, they covered this.
hid Y The unique device hardware ID.
This parameter is only required for iPhone and Android applications, not mobile web sites.
// why not mobile web apps?
This parameter is used for conversion tracking and is necessary in order to determine campaign coverage.
Example of iPhone (40-character alphanumeric value):
483a269b72ab8bc5d4a5fe0659c90f4808ce615b
Example of Android (16-character alphanumeric value): 20014303ca716d69
// ok.
l Accept-Language Y The user’s preferred language. Valid values are the ISO-639-1 2 letter language codes. http://en.wikipedia.org/wiki/List_of_ISO_639-1_codes
// ok. I hope they don't make me look this up...anyway, the 2-letter code is en per the link.
pub Y Your publisher alias as assigned by Jumptap.
// ok. Do I have one yet?
site Y A site alias assigned by Jumptap.
// ok. Do I have one yet?
spot Y An ad spot alias assigned by Jumptap.
// how do I get that?
url Y/N The URL of the page requesting the ad.
// how does an app have a url?
Note that this is not the Referer header (which may reference the previous page), but is rather the URL of the page on which the ad will be displayed.
The value of this parameter must be encoded.
This parameter is required for requests from mobile web sites, but not for requests from applications.
// right.
ua User-Agent Y The user-agent of the handset making the request.
tapLink uses this to identify the handset making the request thus allowing us to serve handset-targeted campaigns and to insure that the correct size ad is returned.
When using the ua parameter, the value must be encoded; do not encode the user-agent HTTP header.
For Opera Mini, the user agent of the handset is passed in the X-OperaMini-Phone-UA header. If you are passing the user agent in the ua parameter, this is the value you must use for Opera Mini requests. If you are passing the request headers, Jumptap will automatically resolve the handset for Opera Mini requests.
// That's ensure, no insure. What's opera mini? The opera browser on the handset?
// How does the interaction with jumptap work? Am I somehow going through a browser
// or something? I don't get it yet.
Optional Request Information
Parameter HTTP Header Required Description
a N Indicates whether adult ads are allowed to be returned in response to the ad request.
By default, adult ads are not returned; they must be specifically requested by the publisher.
Valid values include:
"notallowed" - indicates that adult ads may not be returned. This is the default value for the parameter.
"allowed" - indicates that adult ads may be returned; note that the returned ad may or may not be adult.
"only" - indicates that only adult ads should be returned.
// ok, we can ignore that. This is a family app.
client-ip N The IP Address of the device requesting the ad. This is used by tapLink and our Ad Providers for Carrier/Gateway targeting. Please refer to the Passing IPs section above for further detail.
// ok, we covered that above.
country Y/N The two letter ISO country code of the originating user’s request. http://en.wikipedia.org/wiki/ISO_3166-1_alpha-2.
Country should be passed only if the country of the user originating the ad request is definitively known; it should not be set for a static value for all of your requests.
If country is not included in the request, Jumptap will automatically determine the country based on the user or gateway IP.
The country parameter is required if the postal code (pc) parameter is passed.
If you are passing latitude/longitude, then the country parameter should not be passed.
// Let Jumptap handle that.
ll N Latitude/Longitude
Latitude and longitude must be comma-separated.
The value of this parameter must be encoded.
Example, ll=42.369%2C-71.075
Latitude/Longitude is preferred to and supersedes the postal code and country parameters.
// Hmmm...I could grab that with the GPS function. It will make the ads more tailored.
mt-age N The user's age in years, if known. Valid values include any integer from 1-199.
// No, I'm not going to make the user enter that.
mt-gender N The user's gender, if known. Valid values are 'm' or 'f'
// no.
mt-hhi N The user's household income in thousands, if known.
// no
Valid values include
000_015
Where household income is less than $15,000
015_020
Where household income is $15,000-$19,999
020_030
Where household income is $20,000-$29,999
030_040
Where household income is $30,000-$39,999
040-050
Where household income is $40,000-$49,999
050-075
Where household income is $50,000-$74,999
075-100
Where household income is $75,000-$99,999
100_125
Where household income is $100,000-$124,999
125_150
Where household income is $125,000-$149,999
150_OVER
Where household income is $150,000 or higher
// no
operator N For publishers having on-deck instances of their sites, this parameter should be used to indicate the on-deck mobile operator.
This parameter should be passed only for on-deck instances for which the operator/carrier is definitively known.
For off-deck requests, Jumptap will determine the operator based on request header and gateway IP information.
See Valid Operators for a list of valid operators.
// I don't even know what on-deck/off-deck means yet. I'll ignore it for now.
pc N Postal code
If you are passing latitude/longitude, then the pc parameter should not be passed.
The value of this parameter must be encoded.
If postal code is included in the request, the country parameter is required.
Example: pc=02141&country=us
// ignore for now.
q N For search sites or applications, pass the search terms using the q ("query") parameter.
The value of this parameter should be encoded.
// not a search app.
Referer N The Referer HTTP header.
Note that this is not the URL of the page making the request but rather the previous page.
There is not currently a parameter that corresponds to the Referer header.
// well I guess we don't need to worry about that one.
u ClientID
x-up-subno
x-msisdn
XID
etc
N Unique id of the end-user. tapLink uses this identifier for frequency capping.
Different mobile operators use different headers to pass user information, and as such, we strongly recommend that you forward the device's HTTP headers so that tapLink can determine which header contains the user ID.
Only in cases in which you cannot pass headers should you create your own algorithm to determine which header contains the user ID.
In the specific case in which you are unable to forward the device headers and you cannot create an algorithm to check for user ID within the various possible parameters and your site requires a login, you may pass the hashed login ID in the u parameter.
Please note that the value that you pass in must be unique for each user, but should be consistent for each request from the same user.
// Let's hope we can forward the headers for now. Android runs on a lot of devices.
v Y Version of the Jumptap tapLink API. Currently 'v29' (Version 2.9).
// ok.
Common Errors
HTTP Headers
Not passing HTTP headers.
// let's pass them.
Passing the publishing server's HTTP headers rather than those of the handset.
// Ok. How do I distinguish/retrieve the handset headers?
User-agent
Not encoding the user-agent when passing it in the ua parameter.
// ok.
Double-encoding the user-agent when passing it in the ua parameter.
// ok.
Passing the user-agent of the publisher server rather than the handset.
// ok.
Latitude / Longitude
Not comma-separating the latitude and longitude values.
Not encoding the latitude,longitude.
// ok
Postal Code
Not encoding the postal code.
Not including the country parameter when the postal code is passed.
// ok
Country
Passing a static value with every ad request.
Passing the complete name of the country rather than the two-digit code.
// ok
Display Errors
Not accounting for an empty ad response (e.g. not collapsing the placeholder when no ad is returned).
// ok.
In an iPhone app, not accounting for both supported ad sizes: 300 x 50, 320 x 50.
// ok.
In any application, not setting aside enough vertical space for the banner
// ok.
Response Format
Ads returned from tapLink are valid XHTML. There are a number of benefits to XHTML, each of which makes your inventory more valuable to advertisers:
Using XHTML allows us to accommodate the richer ad units that advertisers are now requesting, including Javascript and rich media ads for those handsets that support them.
// That's good.
Using XHTML allows us to introduce tracking pixels to our ad responses.
// ok.
Using XHTML allows us to introduce additional ad types and functionality in the future without requiring a modification to your integration.
// That's definitely good.
Adding Style Information
Style information can be added to the response by wrapping it in div tags. Common style changes include centering the banner, centering the text below a banner, and changing the color of text below a banner.
// Ok. Man, this sounds complicated. Admob is supposed to be really easy.
Handling the Response
Ad responses are to be displayed in-whole, without modification. Parsing or otherwise modifying the response may lead to unexpected and / or undesired behavior. For example, parsing the image and click may cause you to ignore tracking pixels also contained in the response, thus rendering your site ineligible for third-party tracked campaigns.
// ok.
Handling the Response
Ad responses are to be displayed in-whole, without modification. Parsing or otherwise modifying the response may lead to unexpected and / or undesired behavior. For example, parsing the image and click may cause you to ignore tracking pixels also contained in the response, thus rendering your site ineligible for third-party tracked campaigns.
Banner Type Example Handsets Notes
iPhone Interstitial Apple iPhone / iTouch
Dimensions: 320 x 415 pixels
Supported file types: .gif, .png, .jpg
// I forgot what Interstitial means...between levels, something like that.
iPhone Optimized Banner Apple iPhone / iTouch
Dimensions: 320 x 50 pixels
Supported file types: .gif, .png, .jpg
// Ok, we're not on iPhone yet anyway.
X-Large Banner
Apple iPhone/iTouch
Google G1
Nokia E70
Palm Treo 700p
Dimensions: 300 x 50 pixels
Supported file types: .gif, .png, .jpg
// ok. What's G1? It must run Android.
Large Banner
LG VX-8500 Chocolate
Samsung MM-A900
Dimensions: 216 x 36 pixels
Supported file types: .gif, .png, .jpg
// Ok, funny how they get very specific on the phones. Do I have to worry
// about this?
Medium Banner
LG VX-8000
Motorola RAZRs
Motorola ROKR E1
Dimensions: 168 x 28 pixels
Supported file types: .gif, .png, .jpg
Small Banner
Motorola V195
Dimensions: 120 x 20 pixels
Supported file types: .gif, .png, .jpg
Call-to-action text for banners
All
Dimensions:
24 characters X-Large
18 characters Large
12 characters Medium
10 characters Small
Supported: text, accented characters
Sample Responses
Standard Text Banner
(Couldn't post the html)
HTTP Status Codes
Status Code Description
200 Response indicating that the request completed successfully.
201 This response code is returned when activity reporting events are logged successfully with tapLink.
400 A bad request status is send when not all the required parameters are provided or if any one of the required parameters contains an invalid parameter.
401 Sent when incorrect credentials are sent with the request.
403 Sent when IP restrictions are in effect.
404 Sent when the ad spot or ad provider does not exist.
500 Sent when there is an unexpected server-side error.
503 Sent when the service is currently unavailable.
// Standard error codes.
Timeouts
The publisher is responsible for dealing with errors returned from tapLink. The publisher is also responsible for setting the appropriate socket, connection and read/idle timeout values on their client application to protect themselves from a possible tapLink outage.
The publisher should work with Jumptap to determine the proper timeout values and retry policy based on the type of application the publisher has developed. Setting these timeouts will vary depending on the underlying HTTP client library implementation.
// This whole thing looks pretty complicated. Work with Jumptap?
Ok. That's an kind of in-depth view of what's involved in the interface, and
gives a good background. But, what about sample code? I'm concerned about the possible complexity. We'll tackle that in our next post.
Sunday, June 26, 2011
At last - back to Android Advertising
Ok. After having survived our encounter with submitting an app to apple, we're now back in the Android world. The current state of affairs is that we have done some exploration on some android advertising options, and one of the most reliable and best paying ones to emerge has been a company called...what was it? Jumptap.
I will use them for the US market. Now, I also want to post to the Chinese and Korean market. I'm not sure how that works. But, in the interests of GETTING THIS THING DONE, I will just get it out there with Jumptap for now.
Congratulations! Your account information has been reviewed and approved. is now an approved publisher in the Jumptap mobile ad network.
Setup your mobile site/app to display ads and start earning money:
1. Log-in to your account. (http://www.jumptap.com)
2. Add a site/app to your Jumptap account.
3. Install ad code. We provide you with the sample code needed to display ads. You simply integrate it into your site/app.
4. Site approval. In 1-2 days you will receive an email confirming if your site has been approved. Once approved, your site will be ready to display ads!
Thank you again for becoming a publisher in the Jumptap mobile ad network. We look forward to working with you.
The Jumptap Team
Ok, the site is asking me for an account ID and password. Did I not get them yet? Guess not. So, what do I do now? There doesn't seem to be anything on their site which gives a hint.
Duh - am I the dumb one who can't figure this out?
Sugar. It lets you ask for the password; I entered my company name in the account id field, it sent me a password hint; but it doesn't take the company as the id. Wait, it does. I know, there must be a number or something required in the password.
Yup. That's it. Now, to fill out the app.
Ok. They want a url for the app. I have nothing set up yet. Nor have I deployed the app.
I'm thinking, deploy the app. But then, don't I lose the potential add revenue? Who's going to update to get adds?
What I need to do is build a very simple web page. Just add a few screen shots, that's it.
Here it is: www.kanjisoft.com/jlpt.html.
And, finished submitting the form!
Now, my next step will be to start work on integrating the functionality.
I will use them for the US market. Now, I also want to post to the Chinese and Korean market. I'm not sure how that works. But, in the interests of GETTING THIS THING DONE, I will just get it out there with Jumptap for now.
Congratulations! Your account information has been reviewed and approved.
Setup your mobile site/app to display ads and start earning money:
1. Log-in to your account. (http://www.jumptap.com)
2. Add a site/app to your Jumptap account.
3. Install ad code. We provide you with the sample code needed to display ads. You simply integrate it into your site/app.
4. Site approval. In 1-2 days you will receive an email confirming if your site has been approved. Once approved, your site will be ready to display ads!
Thank you again for becoming a publisher in the Jumptap mobile ad network. We look forward to working with you.
The Jumptap Team
Ok, the site is asking me for an account ID and password. Did I not get them yet? Guess not. So, what do I do now? There doesn't seem to be anything on their site which gives a hint.
Duh - am I the dumb one who can't figure this out?
Sugar. It lets you ask for the password; I entered my company name in the account id field, it sent me a password hint; but it doesn't take the company as the id. Wait, it does. I know, there must be a number or something required in the password.
Yup. That's it. Now, to fill out the app.
Ok. They want a url for the app. I have nothing set up yet. Nor have I deployed the app.
I'm thinking, deploy the app. But then, don't I lose the potential add revenue? Who's going to update to get adds?
What I need to do is build a very simple web page. Just add a few screen shots, that's it.
Here it is: www.kanjisoft.com/jlpt.html.
And, finished submitting the form!
Now, my next step will be to start work on integrating the functionality.
Saturday, June 25, 2011
App submission - submission hold!

Ok. We're officially into day 3 of submitting this app. It's really incredible.
But - we've successfully created the binary - and verified it. That can only be a good thing. But there was this whole 'nother section where I uploaded a bunch of artifacts, and went to upload the binary, only to find that I had to endure the digital equivalent of a Bataan death march to submit the app.
So, now I've decided to circle back and go through that loop again. First, I'll review my blog entries on that area to refamiliarize myself with that process.
I'm not sure this is going to work, mostly because of the wildcard issue. Actually, the bundle id is there; the app id I'm sure I originally put as Mye Quiz App. So it should match whatever it's supposed to matching; I hope.
Ok. My next error. When I try to upload, it says:
"The bundle is invalid. Valid values for the Key UIBackgroundModes in info.plist are audio, location or voip"
Ok. Well, let's recreate the binary. I clicked "Application does not run in background" on quiz-info.plist.
And deleted required background modes, as well as "0 entry".
Build succeeded. Then, I compressed it.
M. Highlight the app located within the "Products" sub-folder and
select 'Reveal in Finder' from the Action popup.
N. Reveal in Finder Use the compress option in Finder to create a
.zip file containing your application. Be sure to compress only the
.app file only and not the entire build folder.
And done. Using the load application utility, the submission was successful. I have survived the Bataan death march.
Now, all that remains is to pray for acceptance from the Almighty Apple.
Friday, June 24, 2011
Bataan death march resumed - submitting an app
Ok. We are a day and 1/2 into this, and no end in sight. The fr***kn f*cd Up app submission process is even worse than I anticipated. What are all these certificates? What are all these provisions? Why did I get a fr*gging error message stating it couldn't find a provisioning file for my app, causing me to have to recreated a whole new app?
Ok. Relax. Calm is the order of the day. You just at least got the release build to work. That's something to build on. You also now have a valid public/private key in the client's name. Anything else? You have a developer provision profile in his name. Not that that matters. My concern is that there will be some name collision with the new app name.
Now - let's try again with the new app name. Or, maybe, the old app name?
No, you created the developer provision profile and certificate under the new name. Didn't you? No, you didn't.
Ok, I'm trying to avoid this problem again:
"A valid signing identity matching this profile could not be found on your keychain".
Which happenned when my signing identity for the app-store provisioning profile didn't match.
Well, I've created a new one cly 4 - for the developer. That a public/private key, and I want to sign with the private key. None of my certs nor his previous certs or profiles re there. So, I'm definitely going with the new app.
O.k. Let's try the Bataan death march again:
http://developer.apple.com/ios/manage/distribution/index.action
Ok, so that's the one with this Bataan death march sequence:
Obtaining your iOS Distribution Certificate
Create and download your iOS Distribution Provisioning Profile for App Store Distribution
Creating and Downloading a Distribution Provisioning Profile for Ad Hoc Distribution
Building your Application with Xcode for Distribution
Verifying a Successful Distribution Build
Updating your Application
Ok, now I need to generate the *distribution* certificate.
Generating a Certificate Signing Request
To request an
iOS Distribution Certificate,
you first need to generate a Certificate Signing Request (CSR) utilizing the Keychain Access application in Mac OS X Leopard.
The creation of a CSR will prompt Keychain Access to simultaneously generate your public and private key pair establishing your iOS Distribution identity.
// Deja vu
in your Applications folder, open the Utilities folder and launch Keychain Access.
// done
In the Preferences menu, set Online Certificate Status Protocol (OSCP) and Certificate Revocation List (CRL) to “Off”.
// done
Choose Keychain Access -> Certificate Assistant -> Request a Certificate from a Certificate Authority.
// this is to request a certificate for my clients IOS Distribution Certificate
Note: If you have a private key highlighted in the Keychain during this process, the resulting Certificate Request will not be accepted by the Provisioning Portal.
Confirm that you are selecting “Request a Certificate From a Certificate Authority...” and not selecting “Request a Certificate From a Certificate Authority with…”
// Ok, I have 3 certificates - one developer for cly, one dev and one dist. for myself.
// Ok, I called the cert clycardistcert1.certsingingrequest
In the User Email Address field, enter your email address. Please ensure that the email address entered matches the information that was submitted when you registered as an iOS Developer.
In the Common Name field enter your Company/Organization/Department name. Please ensure that the name entered matches the information that was submitted when you registered as an iOS Developer.
// Oops..
Ok, I have to confirm with the client what name he put in here.
Ok, I have the name I'm sure he had, it's displayed in the iOS developer's portal.
// Ok, let's try that again.
// Ok, saved it with "cert5" in the certsingingrequest
// Next up:
Your private key is stored in the login Keychain by default and can be viewed in the Keychain Access application under the ‘Keys’ category. To generate a CSR:
Submitting a Certificate Signing Request for Approval
After creating a CSR, log in to the iOS Provisioning Portal and navigate to ‘Certificates’ -> ‘Distribution’ and click the ‘Add Certificate’ button.
// ok, there's one already there. Revoking. Now clicking the "Request Certificate" button.
Click the Upload file button, select your CSR and click ‘Submit’. If the Key Size was not set to 2048 bits during the CSR creation process, the Portal will reject the CSR.
Approve your iOS Distribution Certificate.
// ok, that's done.
What about this:
*If you do not have the WWDR intermediate certificate installed, click here to download now.
I did it once. But, did I uninstall it? Let's look at keychain
Nothing.
Ok, by arranging download by dates, I found the file.
AppleWWDRCA-1.cer
What am I supposed to do with it?
Here's something:
In the ‘Certificates’-->’Distribution’ section of the Portal,
Control-Click the WWDR Intermediate Certificate link
and select “Saved Linked File to Downloads” to initiate download of the certificate.
// I just downloaded it.
After downloading, double-click the certificate to launch Keychain Access and install.
// Let's try it.
// how do I know it's installed?
// Ok, it's got to be the certificate
// "Apple WorldWide Developer Relations Certification Authority".
// Remember, this is from the *distribution* tab of the *provisioning portal*.
// Under key, in the KeyChain Access, we already have a "cc cert4" public private
// key with and iphone developer certification (signed by it?)
Also, a simple Clay Carson Public Private key pair. What is that; where is it from? Is it the one I just created? How did it get in there?
That's why I wanted to use different names - but of course, they make you enter the vanilla name; and then don't have you a way to distinguish between keys.
There's also clrdist1 as a pub/priv key pair. Let's continue.
In the same area of the Provisioning Portal, click on the name of the iOS Distribution Certificate to download.
On your local machine, double-click the downloaded .cer file to launch Keychain Access and install your certificate.
I remember naming the 1; but was it before or after the 4? Sugar. I wish I were more detailed. This stuff is so detailed and tricky. Not my strong point.
The 4 was the developer. I think I was looking at a different display. My certificates is the least confusing. It shows the certificate, and the private key they were signed by. E.g. cly's developer cert was signed by cly cert 4's private key.
Theory: the mere act of creating the certificate request creates the pub/private pair for the cert in the keychain.
How else would dist cert1 and the gener clay carson get there?
// ok - where are we. We're marching through Bataan.
The preparation part:
p://developer.apple.com/ios/manage/distribution/index.action
We're finishing:
Downloading and Installing iOS Distribution Certificates
Which already seems to have been created by *requesting* it, but whatever.
I'm copying it in as distribution-identity-2.cer.
In the same area of the Provisioning Portal, click on the name of the iOS Distribution Certificate to download.
Ok. when I do this, I'm sure I'll have 4 claycarsons instead of 2.
distribution_identity-2.cer
Ah, ok; it showed up under keys, Clay Carson, private. Cert Name: iPhone Distribution, Clay Carson.
Saving as "Clay Carson Distribution Private Key"
Gave xxxxx as the pass
Prompting keychain access to export from my key chain.
Ok - it's *my* keychain, not his, so don't have to worry about using my password.
Ok; so the last sequence was all about creating keys for signing a certificate - an ios distribution certificate.
The next step is to:
Create and download your iOS Distribution Provisioning Profile for App Store Distribution
To successfully build your application with Xcode for distribution via the App Store, you first need to create and download an App Store Distribution Provisioning Profile.
These are different than the Development Provisioning Profiles that were used earlier in that Apple will only accept applications if they are built with an App Store Distribution Provisioning Profile.
Ok, so basically, the build needs that thing to be sent up to the app store.
The Bataan death march lurches onward.
Team Agents should navigate to the Provisioning section of the Provisioning Portal and select the Distribution tab.
// delete the cert4 one
Oops - I deleted the distribution profile.
Select the App Store radio button. // new profile
// add the new profile
Enter the name for your Distribution Provisioning Profile.
// Mye Quiz Application Distribution Profile
Confirm your iOS Distribution Certificate has been created and is displayed.
// yes
Select your wild-card App ID to build all of your applications with your single Distribution Provisioning Profile.
// yes
Click ‘Submit’.
// ok it's pending. Why was the last one invalid? Could I have edited it?
// The good news is that I don't think I had the wild card option before.
Click on the name of the Distribution Provisioning Profile to download the .mobileprovision file.
// Ok, here's the big moment...
Drag the .mobileprovision onto the Xcode or iTunes icon in the dock to install.
Ah...sweeter than sweet. It works this time. No horrible message.
Now, the into unchartered territory:
Building your Application with Xcode for Distribution
Launch Xcode and open your project.
If you have not already done so, drag the Distribution Provisioning Profile downloaded from the Provisioning Portal onto the Xcode or iTunes icon in the dock (or, drag into ‘~/Library/MobileDevice/Provisioning Profiles’ directory.)
Open the Xcode project and Duplicate the “Release” configuration in the Configurations pane of the project's Info panel. Rename this new configuration “Distribution”.
// It wouldn't have hurt to say "right click on the project to bring up the
// menu, then select info panel". That's ok. What's another 15 minutes of my life?
In the Target Info window, select the ‘Build’ tab and set the ‘Configuration’ to ‘Distribution’
In the Target Info window, navigate to the ‘Build’ pane.
Click the ‘Any iOS Device’ pop-up menu below the ‘Code Signing Identity’ field and select the iOS Distribution Certificate/Provisioning Profile pair you wish to sign and install your code with.
// nooooo....there is no Code Signing Identity field...ah, it was a just a
// poor interface.
// There's a gap between the bottom of the list and the bottom of the box, making
// it look as if there were no more entries. Why put a box in a box?
Your iOS Distribution certificate will be in bold with the Provisioning Profile associated with it in grey above. In the example below, ‘iOS Distribution : Example Corp, Inc.’ is the Distribution Certificate and ‘My App Store Distribution Provisioning Profile’ is the .mobileprovision file paired with it.
// Ok. Still alive.
6. In the Properties Pane of the Target Info window, enter the Bundle Identifier portion of your App ID. If you have used an explicit App ID you must enter the Bundle Identifier portion of the App ID in the Identifier field. For example enter com.domainname.applicationname if your App ID is A1B2C3D4E5.com.domainname.applicationname. If you have used a wildcard asterisk character in your App ID, replace the asterisk with whatever string you choose.
// I'm glad I went with the wildcard.
// This must be the plist. I call it Mye Quiz Application.
In the project window, select the Distribution Active Configuration from the overview popup and set the Active SDK to the desired Device.
// ok -
Click ‘Build’. (Note: Your binary must contain a flattened, square-image icon that is 57x57 pixels. This icon is displayed on the iPhone or iPod touch home screen.)
// and don't forget to replace the the new icon!
// Waaah... It built. Wow.
Click ‘Build’. (Note: Your binary must contain a flattened, square-image icon that is 57x57 pixels. This icon is displayed on the iPhone or iPod touch home screen.)
// Compressed.
Verifying a Successful Distribution Build
To confirm your build was successful, check for the following:
Open the Build Log detail view and confirm the presence of the "embedded.mobileprovision” file.
This will take you to the line in the build log that shows the provisioning profile was successfully called.
Ensure that the embedded.mobileproviion is located in the proper “Distribution” build directory and is not located in a “Debug” or “Release” build directory.
Also, confirm that the destination path (at the very end of the build message) is the app you are building.
// Ok. All good. It would have helped if they told you *how* to look at the log.
// I found it by http://stackoverflow.com/questions/1488931/how-do-you-show-xcodes-//build-log-trying-to-verify-if-iphone-distribution-build, clicking a little tiny
// something in the lower right. Screw you apple.
Search for the term “CodeSign” in the Build Log detail view - this will take you to the line in the build log that confirms your application was signed by your
iOS Certificate.
// ok, found something that says code sign.
// More stuff for prosperity:
If your project is lacking any of the above files or pointing to the wrong directory, do the following:
Select the Target and open the Build Settings Inspector. Confirm you are in the Distribution Configuration.
Delete the Code Signing Identity: iOS Distribution : COMPANYNAME
In the Xcode Build Menu, select Clean all Targets.
Delete any existing build directories in your Xcode project using Finder.
Re-launch Xcode and open your Project.
Re-enter the code-signing identity iOS Distribution : COMPANYNAME in the Target Build Settings Inspector.
Rebuild your Project.
Updating your Application
The App Store uses three pieces of information in your application to identify a submission as an update to an existing application. *When you are submitting an update of your application to iTunes Connect for App Store distribution, make sure to:
Use the same Distribution Provisioning Profile to build each new version of your application
Increment the CFBundleVersion and CFBundleShortVersionString values in your project Info.plist file. Note: Version numbers must be period-delimited sequences of positive integers (1.0 to 1.1, or 2.2.1 to 2.2.2).
Ok. Now, I can circle back and recreate all the stuff I did before, then upload the app. It's late. I'll try it tomorrow.
Ok. Relax. Calm is the order of the day. You just at least got the release build to work. That's something to build on. You also now have a valid public/private key in the client's name. Anything else? You have a developer provision profile in his name. Not that that matters. My concern is that there will be some name collision with the new app name.
Now - let's try again with the new app name. Or, maybe, the old app name?
No, you created the developer provision profile and certificate under the new name. Didn't you? No, you didn't.
Ok, I'm trying to avoid this problem again:
"A valid signing identity matching this profile could not be found on your keychain".
Which happenned when my signing identity for the app-store provisioning profile didn't match.
Well, I've created a new one cly 4 - for the developer. That a public/private key, and I want to sign with the private key. None of my certs nor his previous certs or profiles re there. So, I'm definitely going with the new app.
O.k. Let's try the Bataan death march again:
http://developer.apple.com/ios/manage/distribution/index.action
Ok, so that's the one with this Bataan death march sequence:
Obtaining your iOS Distribution Certificate
Create and download your iOS Distribution Provisioning Profile for App Store Distribution
Creating and Downloading a Distribution Provisioning Profile for Ad Hoc Distribution
Building your Application with Xcode for Distribution
Verifying a Successful Distribution Build
Updating your Application
Ok, now I need to generate the *distribution* certificate.
Generating a Certificate Signing Request
To request an
iOS Distribution Certificate,
you first need to generate a Certificate Signing Request (CSR) utilizing the Keychain Access application in Mac OS X Leopard.
The creation of a CSR will prompt Keychain Access to simultaneously generate your public and private key pair establishing your iOS Distribution identity.
// Deja vu
in your Applications folder, open the Utilities folder and launch Keychain Access.
// done
In the Preferences menu, set Online Certificate Status Protocol (OSCP) and Certificate Revocation List (CRL) to “Off”.
// done
Choose Keychain Access -> Certificate Assistant -> Request a Certificate from a Certificate Authority.
// this is to request a certificate for my clients IOS Distribution Certificate
Note: If you have a private key highlighted in the Keychain during this process, the resulting Certificate Request will not be accepted by the Provisioning Portal.
Confirm that you are selecting “Request a Certificate From a Certificate Authority...” and not selecting “Request a Certificate From a Certificate Authority with
// Ok, I have 3 certificates - one developer for cly, one dev and one dist. for myself.
// Ok, I called the cert clycardistcert1.certsingingrequest
In the User Email Address field, enter your email address. Please ensure that the email address entered matches the information that was submitted when you registered as an iOS Developer.
In the Common Name field enter your Company/Organization/Department name. Please ensure that the name entered matches the information that was submitted when you registered as an iOS Developer.
// Oops..
Ok, I have to confirm with the client what name he put in here.
Ok, I have the name I'm sure he had, it's displayed in the iOS developer's portal.
// Ok, let's try that again.
// Ok, saved it with "cert5" in the certsingingrequest
// Next up:
Your private key is stored in the login Keychain by default and can be viewed in the Keychain Access application under the ‘Keys’ category. To generate a CSR:
Submitting a Certificate Signing Request for Approval
After creating a CSR, log in to the iOS Provisioning Portal and navigate to ‘Certificates’ -> ‘Distribution’ and click the ‘Add Certificate’ button.
// ok, there's one already there. Revoking. Now clicking the "Request Certificate" button.
Click the Upload file button, select your CSR and click ‘Submit’. If the Key Size was not set to 2048 bits during the CSR creation process, the Portal will reject the CSR.
Approve your iOS Distribution Certificate.
// ok, that's done.
What about this:
*If you do not have the WWDR intermediate certificate installed, click here to download now.
I did it once. But, did I uninstall it? Let's look at keychain
Nothing.
Ok, by arranging download by dates, I found the file.
AppleWWDRCA-1.cer
What am I supposed to do with it?
Here's something:
In the ‘Certificates’-->’Distribution’ section of the Portal,
Control-Click the WWDR Intermediate Certificate link
and select “Saved Linked File to Downloads” to initiate download of the certificate.
// I just downloaded it.
After downloading, double-click the certificate to launch Keychain Access and install.
// Let's try it.
// how do I know it's installed?
// Ok, it's got to be the certificate
// "Apple WorldWide Developer Relations Certification Authority".
// Remember, this is from the *distribution* tab of the *provisioning portal*.
// Under key, in the KeyChain Access, we already have a "cc cert4" public private
// key with and iphone developer certification (signed by it?)
Also, a simple Clay Carson Public Private key pair. What is that; where is it from? Is it the one I just created? How did it get in there?
That's why I wanted to use different names - but of course, they make you enter the vanilla name; and then don't have you a way to distinguish between keys.
There's also clrdist1 as a pub/priv key pair. Let's continue.
In the same area of the Provisioning Portal, click on the name of the iOS Distribution Certificate to download.
On your local machine, double-click the downloaded .cer file to launch Keychain Access and install your certificate.
I remember naming the 1; but was it before or after the 4? Sugar. I wish I were more detailed. This stuff is so detailed and tricky. Not my strong point.
The 4 was the developer. I think I was looking at a different display. My certificates is the least confusing. It shows the certificate, and the private key they were signed by. E.g. cly's developer cert was signed by cly cert 4's private key.
Theory: the mere act of creating the certificate request creates the pub/private pair for the cert in the keychain.
How else would dist cert1 and the gener clay carson get there?
// ok - where are we. We're marching through Bataan.
The preparation part:
p://developer.apple.com/ios/manage/distribution/index.action
We're finishing:
Downloading and Installing iOS Distribution Certificates
Which already seems to have been created by *requesting* it, but whatever.
I'm copying it in as distribution-identity-2.cer.
In the same area of the Provisioning Portal, click on the name of the iOS Distribution Certificate to download.
Ok. when I do this, I'm sure I'll have 4 claycarsons instead of 2.
distribution_identity-2.cer
Ah, ok; it showed up under keys, Clay Carson, private. Cert Name: iPhone Distribution, Clay Carson.
Saving as "Clay Carson Distribution Private Key"
Gave xxxxx as the pass
Prompting keychain access to export from my key chain.
Ok - it's *my* keychain, not his, so don't have to worry about using my password.
Ok; so the last sequence was all about creating keys for signing a certificate - an ios distribution certificate.
The next step is to:
Create and download your iOS Distribution Provisioning Profile for App Store Distribution
To successfully build your application with Xcode for distribution via the App Store, you first need to create and download an App Store Distribution Provisioning Profile.
These are different than the Development Provisioning Profiles that were used earlier in that Apple will only accept applications if they are built with an App Store Distribution Provisioning Profile.
Ok, so basically, the build needs that thing to be sent up to the app store.
The Bataan death march lurches onward.
Team Agents should navigate to the Provisioning section of the Provisioning Portal and select the Distribution tab.
// delete the cert4 one
Oops - I deleted the distribution profile.
Select the App Store radio button. // new profile
// add the new profile
Enter the name for your Distribution Provisioning Profile.
// Mye Quiz Application Distribution Profile
Confirm your iOS Distribution Certificate has been created and is displayed.
// yes
Select your wild-card App ID to build all of your applications with your single Distribution Provisioning Profile.
// yes
Click ‘Submit’.
// ok it's pending. Why was the last one invalid? Could I have edited it?
// The good news is that I don't think I had the wild card option before.
Click on the name of the Distribution Provisioning Profile to download the .mobileprovision file.
// Ok, here's the big moment...
Drag the .mobileprovision onto the Xcode or iTunes icon in the dock to install.
Ah...sweeter than sweet. It works this time. No horrible message.
Now, the into unchartered territory:
Building your Application with Xcode for Distribution
Launch Xcode and open your project.
If you have not already done so, drag the Distribution Provisioning Profile downloaded from the Provisioning Portal onto the Xcode or iTunes icon in the dock (or, drag into ‘~/Library/MobileDevice/Provisioning Profiles’ directory.)
Open the Xcode project and Duplicate the “Release” configuration in the Configurations pane of the project's Info panel. Rename this new configuration “Distribution”.
// It wouldn't have hurt to say "right click on the project to bring up the
// menu, then select info panel". That's ok. What's another 15 minutes of my life?
In the Target Info window, select the ‘Build’ tab and set the ‘Configuration’ to ‘Distribution’
In the Target Info window, navigate to the ‘Build’ pane.
Click the ‘Any iOS Device’ pop-up menu below the ‘Code Signing Identity’ field and select the iOS Distribution Certificate/Provisioning Profile pair you wish to sign and install your code with.
// nooooo....there is no Code Signing Identity field...ah, it was a just a
// poor interface.
// There's a gap between the bottom of the list and the bottom of the box, making
// it look as if there were no more entries. Why put a box in a box?
Your iOS Distribution certificate will be in bold with the Provisioning Profile associated with it in grey above. In the example below, ‘iOS Distribution : Example Corp, Inc.’ is the Distribution Certificate and ‘My App Store Distribution Provisioning Profile’ is the .mobileprovision file paired with it.
// Ok. Still alive.
6. In the Properties Pane of the Target Info window, enter the Bundle Identifier portion of your App ID. If you have used an explicit App ID you must enter the Bundle Identifier portion of the App ID in the Identifier field. For example enter com.domainname.applicationname if your App ID is A1B2C3D4E5.com.domainname.applicationname. If you have used a wildcard asterisk character in your App ID, replace the asterisk with whatever string you choose.
// I'm glad I went with the wildcard.
// This must be the plist. I call it Mye Quiz Application.
In the project window, select the Distribution Active Configuration from the overview popup and set the Active SDK to the desired Device.
// ok -
Click ‘Build’. (Note: Your binary must contain a flattened, square-image icon that is 57x57 pixels. This icon is displayed on the iPhone or iPod touch home screen.)
// and don't forget to replace the the new icon!
// Waaah... It built. Wow.
Click ‘Build’. (Note: Your binary must contain a flattened, square-image icon that is 57x57 pixels. This icon is displayed on the iPhone or iPod touch home screen.)
// Compressed.
Verifying a Successful Distribution Build
To confirm your build was successful, check for the following:
Open the Build Log detail view and confirm the presence of the "embedded.mobileprovision” file.
This will take you to the line in the build log that shows the provisioning profile was successfully called.
Ensure that the embedded.mobileproviion is located in the proper “Distribution” build directory and is not located in a “Debug” or “Release” build directory.
Also, confirm that the destination path (at the very end of the build message) is the app you are building.
// Ok. All good. It would have helped if they told you *how* to look at the log.
// I found it by http://stackoverflow.com/questions/1488931/how-do-you-show-xcodes-//build-log-trying-to-verify-if-iphone-distribution-build, clicking a little tiny
// something in the lower right. Screw you apple.
Search for the term “CodeSign” in the Build Log detail view - this will take you to the line in the build log that confirms your application was signed by your
iOS Certificate.
// ok, found something that says code sign.
// More stuff for prosperity:
If your project is lacking any of the above files or pointing to the wrong directory, do the following:
Select the Target and open the Build Settings Inspector. Confirm you are in the Distribution Configuration.
Delete the Code Signing Identity: iOS Distribution : COMPANYNAME
In the Xcode Build Menu, select Clean all Targets.
Delete any existing build directories in your Xcode project using Finder.
Re-launch Xcode and open your Project.
Re-enter the code-signing identity iOS Distribution : COMPANYNAME in the Target Build Settings Inspector.
Rebuild your Project.
Updating your Application
The App Store uses three pieces of information in your application to identify a submission as an update to an existing application. *When you are submitting an update of your application to iTunes Connect for App Store distribution, make sure to:
Use the same Distribution Provisioning Profile to build each new version of your application
Increment the CFBundleVersion and CFBundleShortVersionString values in your project Info.plist file. Note: Version numbers must be period-delimited sequences of positive integers (1.0 to 1.1, or 2.2.1 to 2.2.2).
Ok. Now, I can circle back and recreate all the stuff I did before, then upload the app. It's late. I'll try it tomorrow.
App submission - try, try again
Ok. We are back into our continuing saga of submitting the app for a client to the app store. When we called it quits last night, we were in the middle of a Bataan death march to a bewildering and expanding series of steps which would lead to the pot of gold of just getting the app submitted.
Ok, let's venture over to that url in Safari and see where we're at as far as that goes.
Ok, that's the IOS Provisioning Portal. It has tabs for Development, Distribution, History and HowTo.
Ok, but where's the list of instructions I was following?
It was somewhere like this:
http://developer.apple.com/ios/manage/distribution/index.action

Ok, so that's the one with this Bataan death march sequence:
Obtaining your iOS Distribution Certificate
Create and download your iOS Distribution Provisioning Profile for App Store Distribution
Creating and Downloading a Distribution Provisioning Profile for Ad Hoc Distribution
Building your Application with Xcode for Distribution
Verifying a Successful Distribution Build
Updating your Application
Ok, So, I was hopefully getting near the end of 1. I had just saved a p12 private key.
Create and download your iOS Distribution Provisioning Profile for App Store Distribution
To successfully build your application with Xcode for distribution via the App Store, you first need to create and download an App Store Distribution Provisioning Profile.
What could this entity possible be?
These are different than the Development Provisioning Profiles that were used earlier in that Apple will only accept applications if they are built with an App Store Distribution Provisioning Profile.
Ok. So, it's something I need to do. I think the development provisioning profile was for a device? I forget.
Note: App Store provisioning profiles do not allow for a distribution built application to be installed on an Apple device. To install your distribution ready application on a device, you must create an Ad Hoc provisioning profile.
Ok, I'm not worrying about ad-hoc right now.
Team Agents should navigate to the Provisioning section of the Provisioning Portal and select the Distribution tab.
Done.
Select the App Store radio button.
Ok. where is that? I don't see it.
Let's go to "howTo"
:A Provisioning Profile is a collection of digital entities that uniquely ties developers and devices to an authorized iOS Development Team and enables a device to be used for testing. A Development Provisioning Profile must be installed on each device on which you wish to run your application code. Each Development Provisioning Profile will contain a set of iOS Development Certificates, Unique Device Identifiers and an App ID.
Devices specified within the provisioning profile can be used for testing only by those individuals whose iOS Development Certificates are included in the profile. A single device can contain multiple provisioning profiles.
Creating a Development Provisioning Profile
Installing a Development Provisioning Profile
Building and Installing your Development Application"
No - the above is Development provisioning profile.
// note - this processs is endlessly confusing. You can see plainly how it said
"Create and download your iOS Distribution Provisioning Profile for App Store Distribution
To successfully build your application with Xcode for distribution via the App Store, you first need to create and download an App Store Distribution Provisioning Profile. "
// and then said:
Team Agents should navigate to the Provisioning section of the Provisioning Portal and select the Distribution tab.
Select the App Store radio button.
// Yet there is no app store radio button. Plah.
Let's google this:
"App Store Distribution Provisioning Profile:"
Here something at:
http://developer.apple.com/library/ios/#documentation/Xcode/Conceptual/iphone_development/145-Distributing_Applications/distributing_applications.html
Distributing Applications
When you’re ready to distribute your application for testing or for general distribution through the App Store, you need to create an archive of the application using a distribution provisioning profile, and send it to application testers or submit it to iTunes Connect. This chapter shows how to perform these tasks.
Publishing Your Application for Distribution
When you’re ready to publish your application for general distribution through the App Store, you submit it to iTunes Connect.
This section describes how to prepare your application for submission and how to submit it to iTunes Connect.
========================================================
Creating a Distribution Profile for Your Application
To create a distribution profile for your application:
Create a distribution provisioning profile in the Portal with these characteristics:
Distribution method
App Store
Profile name
Distribution Profile
App ID
The appropriate application ID for your application.
Download the distribution profile and install it in the Xcode Organizer.
Drag the.mobileprovision file to the Provisioning Profiles list under DEVELOPMENT in the Organizer.
What? That's it? No go there, do this, do that?
Ok, let's go back here:
https://developer.apple.com/ios/manage/provisioningprofiles/viewDistributionProfiles.action
Team Agents should navigate to the Provisioning section of the Provisioning Portal and select the Distribution tab.
// Done
Select the App Store radio button.
// Let's try the "New Profile" button. That's the only possibility.
Enter the name for your Distribution Provisioning Profile.
Distribution Profile
// also selecting "App Store" instead of "Ad Hoc"
Confirm your iOS Distribution Certificate has been created and is displayed.
// There's nothing there. But, I've created it before.
Select your wild-card App ID to build all of your applications with your single Distribution Provisioning Profile.
// I didn't select a wild card. I'll just go with the app I uploaded. It's available on a drop-down box.
Click ‘Submit’.
// Ok. We now have:
// Provisioning profile app id Status
// My Quiz App Distribution Profile SN6LAS6AYP.com.factorenterpris... Active
Click on the name of the Distribution Provisioning Profile to download the .mobileprovision file.
// downloaded..
Drag the .mobileprovision onto the Xcode or iTunes icon in the dock to install.
// done - and the inevitable problem:
"A valid signing identity matching this profile could not be found on your keychain".
// Quel surprise. Well I put three identities into the keychain.
Let's check goole for that error.
Here's a good possible link:
http://stackoverflow.com/questions/999313/iphone-app-signing-a-valid-signing-identity-matching-this-profile-could-not-be-f
I'm trying this, but it might only work for developer...
After carefully going through the thread here and checking all the solutions proposed by people, I can confidently claim this, after following the steps mentioned at the Apple developer account for creating CSR and mobile provision file, just do this!,
Launch Xcode.
Select window->Oragnizer
Click this refresh button and that filthy yellow bar will remove instantly.
// Well, maybe I didn't install the .p12. But when I double click on it, I get a couple of passwords. But, when I try my own,
// maybe I entered the wrong one, I get this:
// MAC verification failed during PKCS12 Import.
This one got a lot of votes.
I had the same problem: I first downloaded my certificates to my small MacBook while on the run. When trying to install the certificates on my iMac... then I ran into the problems described on this page.
After spending hours pulling my hair out like many of you, I performed the following steps to fix it:
Close all your stuff except your webpage that should be logged into App Dev center.
Open Xcode. Click WINDOW > ORGANIZER > select "Provisioning Profiles" on the left. That should bring up your provisioning profiles. Highlight one by one (if more than 1), right click and delete profile. Yes, just do it! Delete them all! (I kept making a new one after a new one trying to make the thing work.)
From the first page you see after logging into the App Dev Center on the right side click "iOS PROVISIONING PORTAL" > (do not "launch assistant"). Instead click on the left side. Select CERTIFICATES. You will probably have just one line listed with your name/company - from there click on the right side REVOKE. Click OK to verify that's what you want to do.
On the same page click DEVICES. Click the box next to your device you are trying to provision and click REMOVE SELECTED. Again click OK to verify.
Wait about 2 minutes to let Apple do their thing.
Now click on "HOME" that is on the left side navigation.
Click "Launch Assistant"
create a new app ID - call it whatever you want. Just make sure it's unique enough to know that's the one you just created because the others you've been messing with all day will not be deleted from Apples Dev Center.
You should be able to follow the rest of the Assistant without troubles -- the main thing is you just had to delete your old provision profiles and start over.
Good Luck!
Sheesh. I'm walking through the whole damn thing again. Creating a new App Id and everything. Maybe it's for the best.
Ok; after creating the new app, I'm back to keychains again:
aunch Keychain Access
In the Applications folder on your Mac, open the Utilities folder and launch Keychain Access.
Within the Keychain Access drop down menu, select Keychain Access > Certificate Assistant > Request a Certificate from a Certificate Authority
Ok, this time give it a specal name cccert4...basically it has cert 4 in it. It's an cly's upload folder.
In the Certificate Information window, enter the following information:
In the User Email Address field, enter your email address
In the Common Name field, create a name for your private key
(eg. John Doe Dev Key)
In the Request is group, select the "Saved to disk" option
Click Continue within Keychain Access to complete the CSR generating process
// Damn. The cert name is still showiny up as cly carson. How did that happen. Damn.
// Well, here's my description: Cly Carson Cert4
// It has my ipod touch id.
// Ok, it's generated.
// Profile is Cly Carson Cert 4
// Cert name is Cly Carson
// Ok, I deleted the old provisioning profile (under my name) and put it under his name.
Step 3: Verify Provisioning Profile Installation
Your Provisioning Profile file should appear in the "Provisioning" section within the Summary tab of Xcode's Organizer window.
// Ok, it's there.
// Next
Step 1: Download
Download & Install Your Development Certificate
Ok, this is called:
developer_identity-1.cer
Step 2: Install
On your Mac, double-click the downloaded .cer file to launch Keychain Access and install your certificate.
// now this is going to put it into the keychain
// ah, there it is. His private key is under cly carson cert 4. Now I have it identified.
Step 3: Verify your private and public keys in Keychain Access
Verify the iOS Developer private and public keys are paired together in the Keychain Access application to ensure your Certificate is properly configured on your Mac.
// Yes, under Keys. Perfect.
Ok, try to run it. Error - he appears more than once on the keychain. Delete all but the most recent.
Now, it just crashes; clicking on error only says gc exited. A green check next to the the file with the app id.
But now, if I start the simulator, it works. Then, start it on device in debug, and it works. But, I don't like the "your company your domain" in that file. It's going screw me up for sure.
How can I fix that?
Ok, that problem is solved. It turns out you need to edit the /project.pbxproj to fix it.
Ok. Let's post this for now, and take a break. My eyes are getting bleary. This is a monster.
Ok, let's venture over to that url in Safari and see where we're at as far as that goes.
Ok, that's the IOS Provisioning Portal. It has tabs for Development, Distribution, History and HowTo.
Ok, but where's the list of instructions I was following?
It was somewhere like this:
http://developer.apple.com/ios/manage/distribution/index.action

Ok, so that's the one with this Bataan death march sequence:
Obtaining your iOS Distribution Certificate
Create and download your iOS Distribution Provisioning Profile for App Store Distribution
Creating and Downloading a Distribution Provisioning Profile for Ad Hoc Distribution
Building your Application with Xcode for Distribution
Verifying a Successful Distribution Build
Updating your Application
Ok, So, I was hopefully getting near the end of 1. I had just saved a p12 private key.
Create and download your iOS Distribution Provisioning Profile for App Store Distribution
To successfully build your application with Xcode for distribution via the App Store, you first need to create and download an App Store Distribution Provisioning Profile.
What could this entity possible be?
These are different than the Development Provisioning Profiles that were used earlier in that Apple will only accept applications if they are built with an App Store Distribution Provisioning Profile.
Ok. So, it's something I need to do. I think the development provisioning profile was for a device? I forget.
Note: App Store provisioning profiles do not allow for a distribution built application to be installed on an Apple device. To install your distribution ready application on a device, you must create an Ad Hoc provisioning profile.
Ok, I'm not worrying about ad-hoc right now.
Team Agents should navigate to the Provisioning section of the Provisioning Portal and select the Distribution tab.
Done.
Select the App Store radio button.
Ok. where is that? I don't see it.
Let's go to "howTo"
:A Provisioning Profile is a collection of digital entities that uniquely ties developers and devices to an authorized iOS Development Team and enables a device to be used for testing. A Development Provisioning Profile must be installed on each device on which you wish to run your application code. Each Development Provisioning Profile will contain a set of iOS Development Certificates, Unique Device Identifiers and an App ID.
Devices specified within the provisioning profile can be used for testing only by those individuals whose iOS Development Certificates are included in the profile. A single device can contain multiple provisioning profiles.
Creating a Development Provisioning Profile
Installing a Development Provisioning Profile
Building and Installing your Development Application"
No - the above is Development provisioning profile.
// note - this processs is endlessly confusing. You can see plainly how it said
"Create and download your iOS Distribution Provisioning Profile for App Store Distribution
To successfully build your application with Xcode for distribution via the App Store, you first need to create and download an App Store Distribution Provisioning Profile. "
// and then said:
Team Agents should navigate to the Provisioning section of the Provisioning Portal and select the Distribution tab.
Select the App Store radio button.
// Yet there is no app store radio button. Plah.
Let's google this:
"App Store Distribution Provisioning Profile:"
Here something at:
http://developer.apple.com/library/ios/#documentation/Xcode/Conceptual/iphone_development/145-Distributing_Applications/distributing_applications.html
Distributing Applications
When you’re ready to distribute your application for testing or for general distribution through the App Store, you need to create an archive of the application using a distribution provisioning profile, and send it to application testers or submit it to iTunes Connect. This chapter shows how to perform these tasks.
Publishing Your Application for Distribution
When you’re ready to publish your application for general distribution through the App Store, you submit it to iTunes Connect.
This section describes how to prepare your application for submission and how to submit it to iTunes Connect.
========================================================
Creating a Distribution Profile for Your Application
To create a distribution profile for your application:
Create a distribution provisioning profile in the Portal with these characteristics:
Distribution method
App Store
Profile name
App ID
The appropriate application ID for your application.
Download the distribution profile and install it in the Xcode Organizer.
Drag the
What? That's it? No go there, do this, do that?
Ok, let's go back here:
https://developer.apple.com/ios/manage/provisioningprofiles/viewDistributionProfiles.action
Team Agents should navigate to the Provisioning section of the Provisioning Portal and select the Distribution tab.
// Done
Select the App Store radio button.
// Let's try the "New Profile" button. That's the only possibility.
Enter the name for your Distribution Provisioning Profile.
// also selecting "App Store" instead of "Ad Hoc"
Confirm your iOS Distribution Certificate has been created and is displayed.
// There's nothing there. But, I've created it before.
Select your wild-card App ID to build all of your applications with your single Distribution Provisioning Profile.
// I didn't select a wild card. I'll just go with the app I uploaded. It's available on a drop-down box.
Click ‘Submit’.
// Ok. We now have:
// Provisioning profile app id Status
// My Quiz App Distribution Profile SN6LAS6AYP.com.factorenterpris... Active
Click on the name of the Distribution Provisioning Profile to download the .mobileprovision file.
// downloaded..
Drag the .mobileprovision onto the Xcode or iTunes icon in the dock to install.
// done - and the inevitable problem:
"A valid signing identity matching this profile could not be found on your keychain".
// Quel surprise. Well I put three identities into the keychain.
Let's check goole for that error.
Here's a good possible link:
http://stackoverflow.com/questions/999313/iphone-app-signing-a-valid-signing-identity-matching-this-profile-could-not-be-f
I'm trying this, but it might only work for developer...
After carefully going through the thread here and checking all the solutions proposed by people, I can confidently claim this, after following the steps mentioned at the Apple developer account for creating CSR and mobile provision file, just do this!,
Launch Xcode.
Select window->Oragnizer
Click this refresh button and that filthy yellow bar will remove instantly.
// Well, maybe I didn't install the .p12. But when I double click on it, I get a couple of passwords. But, when I try my own,
// maybe I entered the wrong one, I get this:
// MAC verification failed during PKCS12 Import.
This one got a lot of votes.
I had the same problem: I first downloaded my certificates to my small MacBook while on the run. When trying to install the certificates on my iMac... then I ran into the problems described on this page.
After spending hours pulling my hair out like many of you, I performed the following steps to fix it:
Close all your stuff except your webpage that should be logged into App Dev center.
Open Xcode. Click WINDOW > ORGANIZER > select "Provisioning Profiles" on the left. That should bring up your provisioning profiles. Highlight one by one (if more than 1), right click and delete profile. Yes, just do it! Delete them all! (I kept making a new one after a new one trying to make the thing work.)
From the first page you see after logging into the App Dev Center on the right side click "iOS PROVISIONING PORTAL" > (do not "launch assistant"). Instead click on the left side. Select CERTIFICATES. You will probably have just one line listed with your name/company - from there click on the right side REVOKE. Click OK to verify that's what you want to do.
On the same page click DEVICES. Click the box next to your device you are trying to provision and click REMOVE SELECTED. Again click OK to verify.
Wait about 2 minutes to let Apple do their thing.
Now click on "HOME" that is on the left side navigation.
Click "Launch Assistant"
create a new app ID - call it whatever you want. Just make sure it's unique enough to know that's the one you just created because the others you've been messing with all day will not be deleted from Apples Dev Center.
You should be able to follow the rest of the Assistant without troubles -- the main thing is you just had to delete your old provision profiles and start over.
Good Luck!
Sheesh. I'm walking through the whole damn thing again. Creating a new App Id and everything. Maybe it's for the best.
Ok; after creating the new app, I'm back to keychains again:
aunch Keychain Access
In the Applications folder on your Mac, open the Utilities folder and launch Keychain Access.
Within the Keychain Access drop down menu, select Keychain Access > Certificate Assistant > Request a Certificate from a Certificate Authority
Ok, this time give it a specal name cccert4...basically it has cert 4 in it. It's an cly's upload folder.
In the Certificate Information window, enter the following information:
In the User Email Address field, enter your email address
In the Common Name field, create a name for your private key
(eg. John Doe Dev Key)
In the Request is group, select the "Saved to disk" option
Click Continue within Keychain Access to complete the CSR generating process
// Damn. The cert name is still showiny up as cly carson. How did that happen. Damn.
// Well, here's my description: Cly Carson Cert4
// It has my ipod touch id.
// Ok, it's generated.
// Profile is Cly Carson Cert 4
// Cert name is Cly Carson
// Ok, I deleted the old provisioning profile (under my name) and put it under his name.
Step 3: Verify Provisioning Profile Installation
Your Provisioning Profile file should appear in the "Provisioning" section within the Summary tab of Xcode's Organizer window.
// Ok, it's there.
// Next
Step 1: Download
Download & Install Your Development Certificate
Ok, this is called:
developer_identity-1.cer
Step 2: Install
On your Mac, double-click the downloaded .cer file to launch Keychain Access and install your certificate.
// now this is going to put it into the keychain
// ah, there it is. His private key is under cly carson cert 4. Now I have it identified.
Step 3: Verify your private and public keys in Keychain Access
Verify the iOS Developer private and public keys are paired together in the Keychain Access application to ensure your Certificate is properly configured on your Mac.
// Yes, under Keys. Perfect.
Ok, try to run it. Error - he appears more than once on the keychain. Delete all but the most recent.
Now, it just crashes; clicking on error only says gc exited. A green check next to the the file with the app id.
But now, if I start the simulator, it works. Then, start it on device in debug, and it works. But, I don't like the "your company your domain" in that file. It's going screw me up for sure.
How can I fix that?
Ok, that problem is solved. It turns out you need to edit the /project.pbxproj to fix it.
Ok. Let's post this for now, and take a break. My eyes are getting bleary. This is a monster.
Subscribe to:
Posts (Atom)